.avif)
Buttery Mochi Muffins (Gluten-Free with a Soft, Chewy Texture)


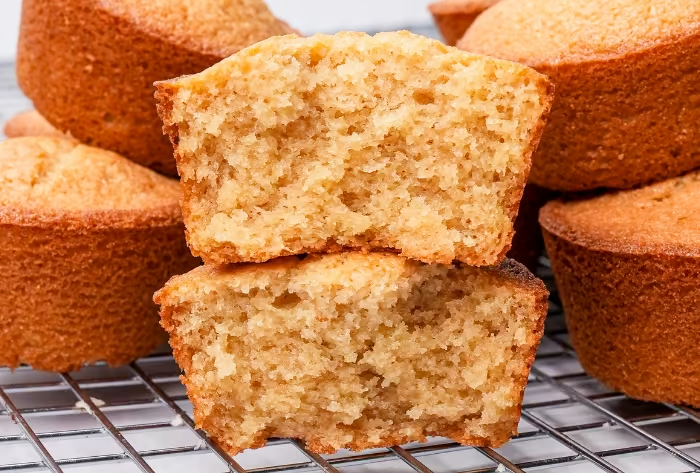
Mochi muffins are naturally gluten-free baked treats made with sweet rice flour. And although they're baked in a muffin pan, they're texturally much closer to mochi than a traditional wheat-based muffin in that they have a uniquely pleasant chewy-elastic texture. I developed this recipe to strike a balance between that addictive chewy texture and lightness; my mochi muffin recipe is both buttery and chewy with a soft, lightly aerated crumb and crispy exterior.
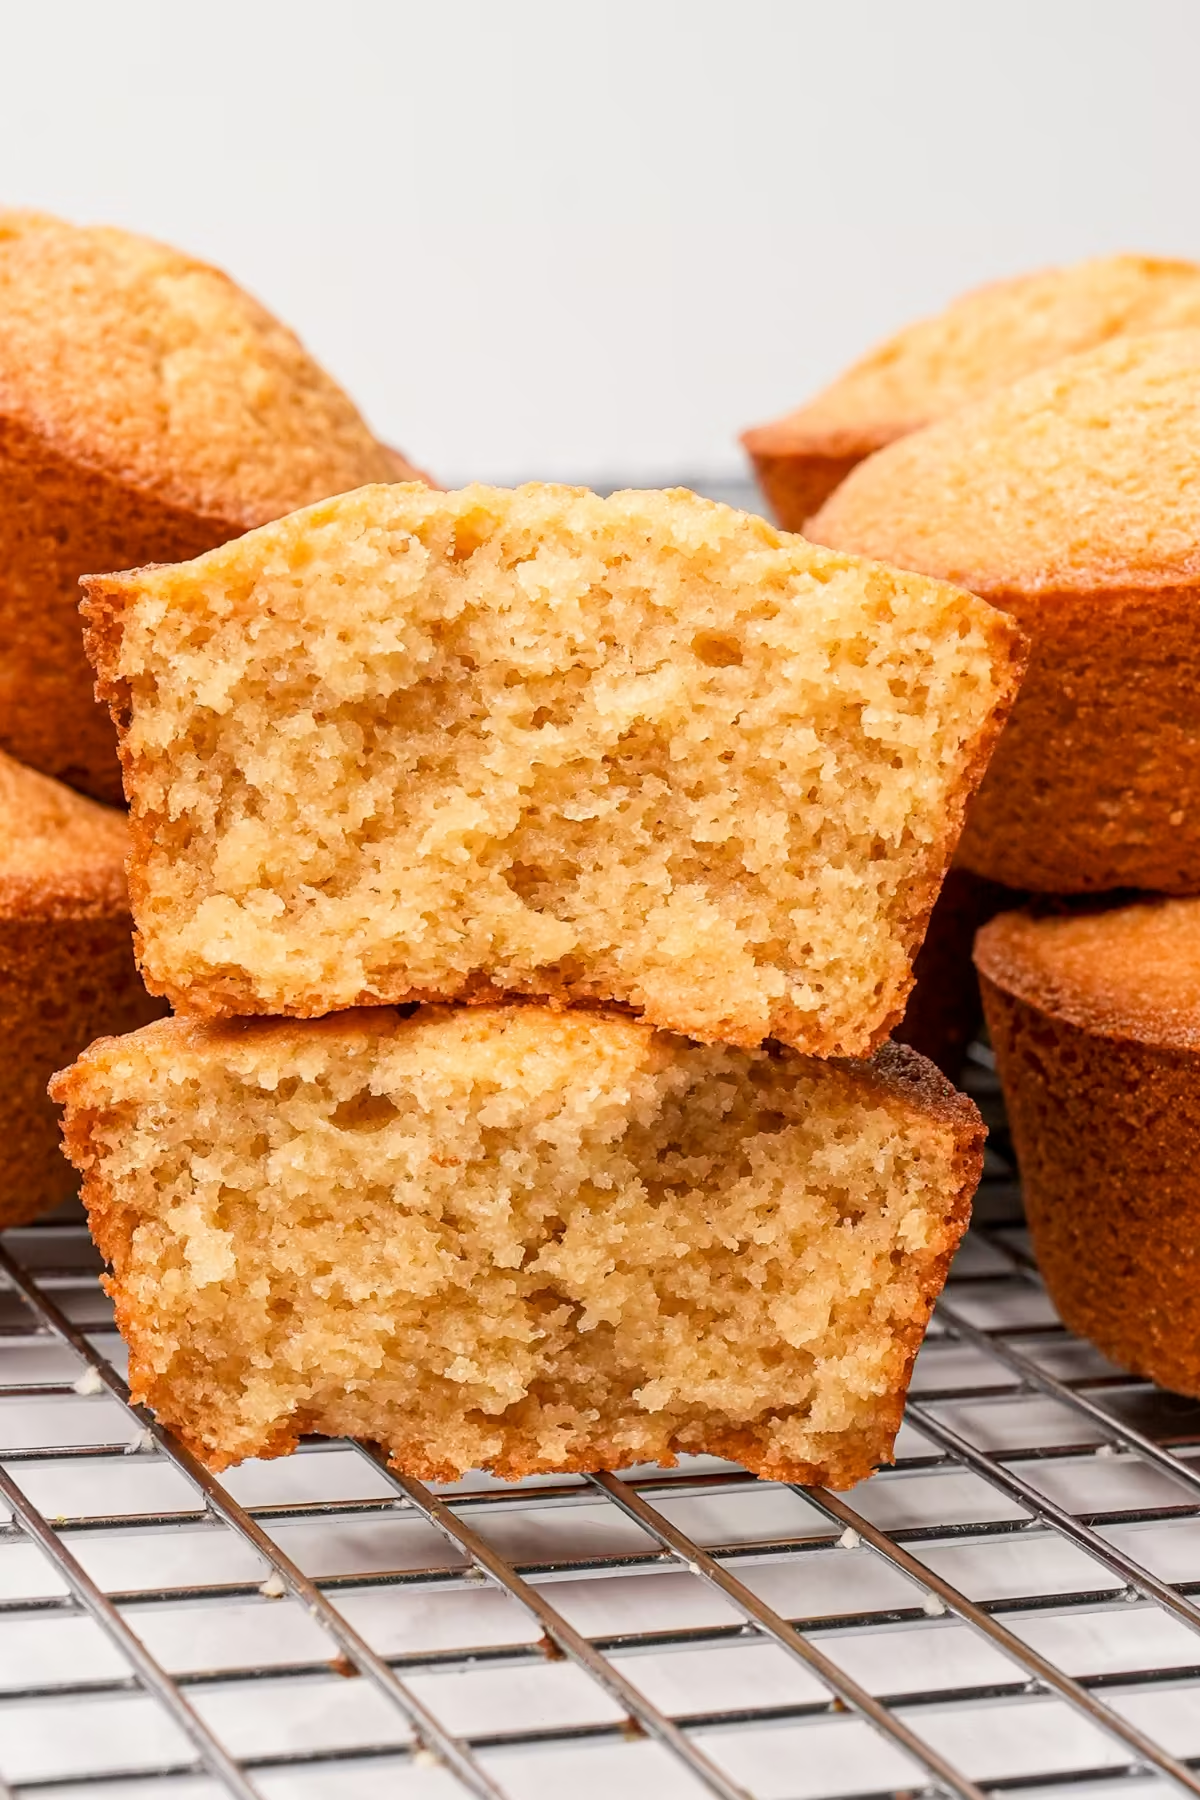
What is the texture of my Buttery Mochi Muffins?
My mochi muffins have a pleasantly crunchy exterior with a super soft, chewy interior crumb. There is a slight aeration to my mochi muffins, as I didn’t want them to feel and taste overly heavy. As they sit out, the crust softens to a chewy texture as well. Due to the nature of the sweet rice flour and high-fat batter, these muffins should last for a few days with a nice moist and chewy center.
The gooey and elastic texture of mochi muffins comes primarily from the glutinous sweet rice flour. Compared to a wheat-based flour, such as your all-purpose, plain, and cake flours, sweet rice flour has a very high percentage of <span class="def-term" data-term="amylopectin">amylopectin</span>. Sweet rice flour runs 98% amylopectin, whereas wheat flours contain around 70%-75% amylopectin.
This is an important distinction to make because when my mochi muffin batter is heated, the amylopectin (as well as <span class="def-term" data-term="amylose">amylose</span>, another starch molecule) absorbs water, swells, and <span class="def-term" data-term="gelatinization">gelatinizes</span>. But because amylopectin is a big branchy-type molecule (i.e., it has lots of arms like a tree branch!), it can’t pack as tightly and forms this loose structure that holds onto a good amount of water. That’s where that super chewy-gooey texture comes from.
What I found is that the chewy-gooey texture can be customized, in a way. It is largely determined by the amount of moisture in a recipe. If you’re looking for that super stretchy-elastic texture, you have to add quite a bit of water (or water-based ingredients) into your recipe, such as milk, water, coconut milk, etc. Here are muffins I tested with varying hydration ratios:
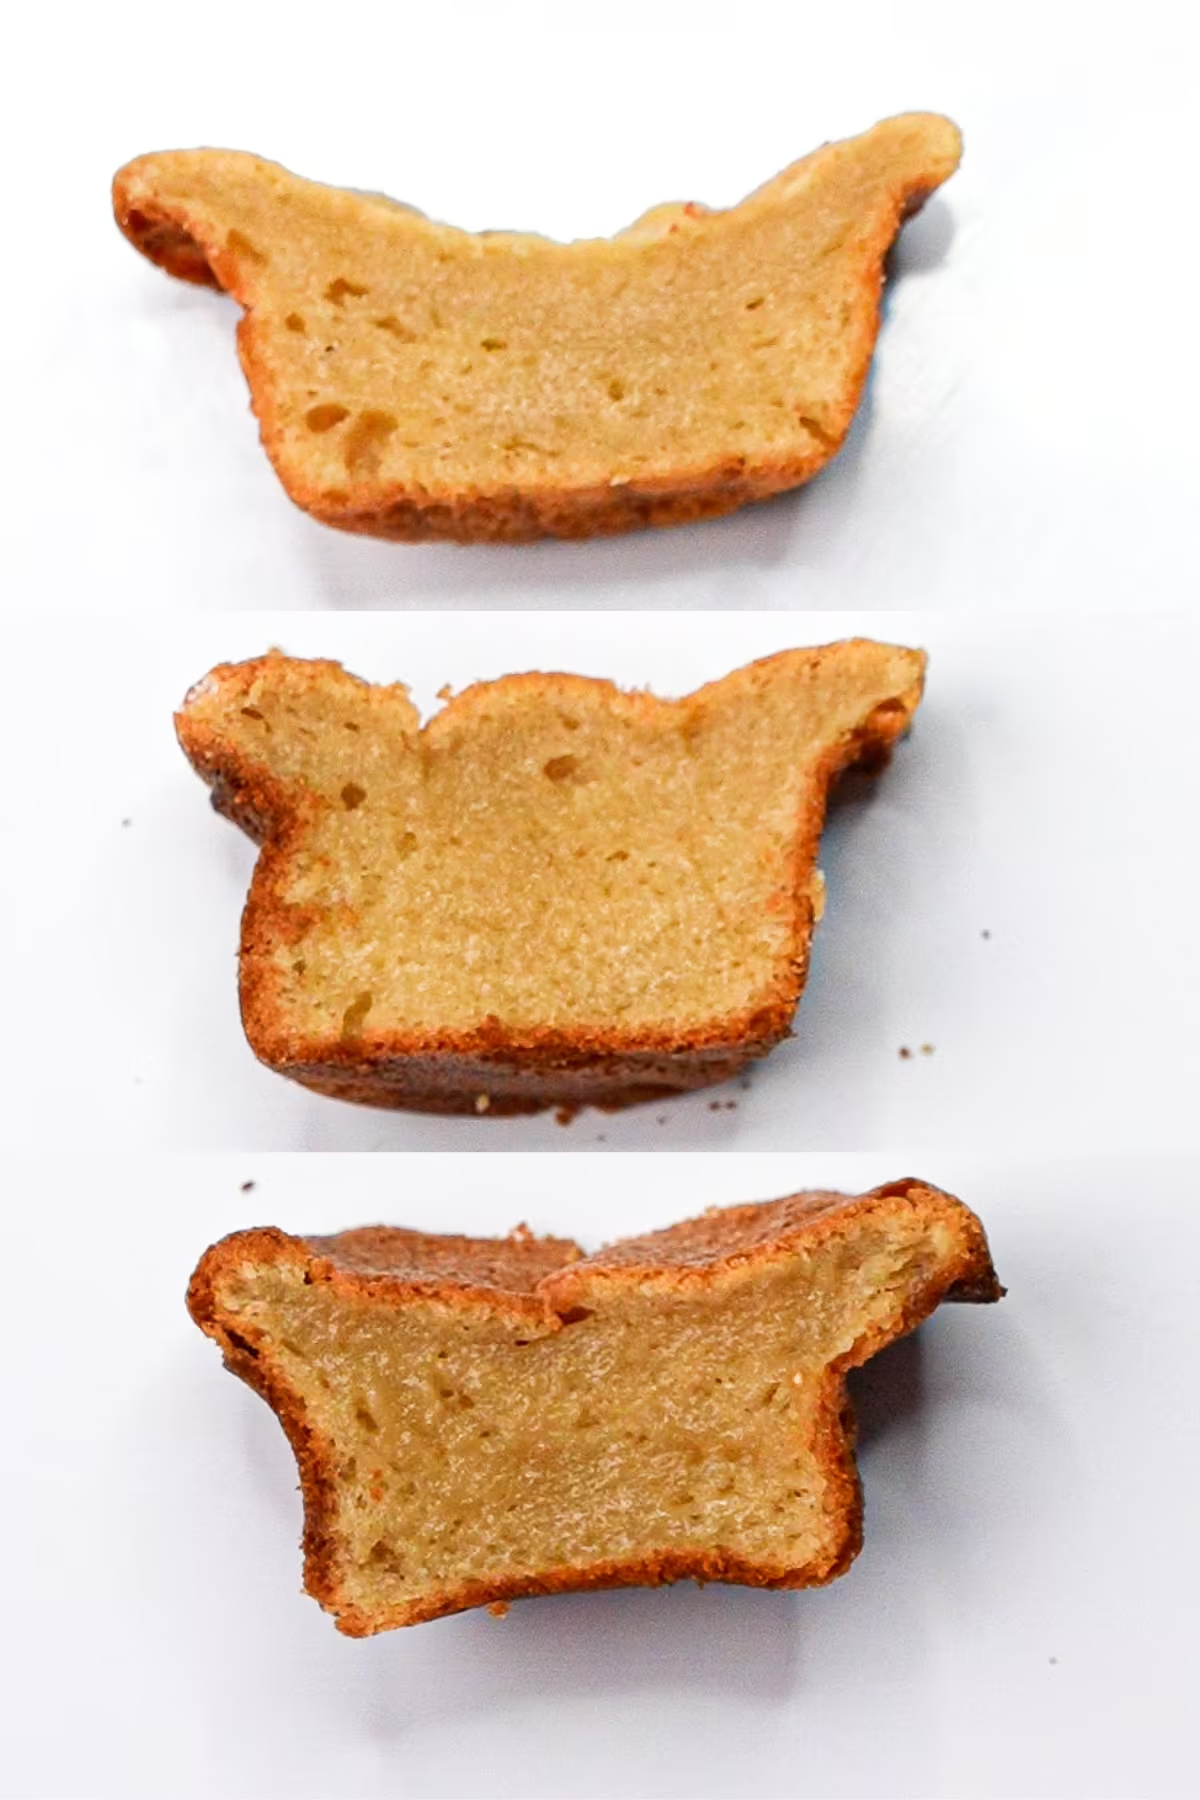
The only caveat there is that all semblance of a cake really goes out the window because the system is so saturated with water that very little aeration is possible. The batter is simply too heavy. That’s also why you see a lot of mochi muffins with collapsed tops. That indentation or a super smooth surface can be an indicator of a mochi muffin with high hydration, if that’s what you’re looking for. As much as I do love that “butter mochi” texture, I went with a slightly less hydrated recipe. Not so dry that it was like a traditional muffin or cake made with wheat flour, but kind of in the middle. You still get the super chewy texture, but with a bit added aeration for a touch of lightness.
💡TIP: Higher amylopectin starches- such as sweet rice flour and tapioca starch are more stale-resistant. Their highly branched structure makes it more difficult for the starch molecules to realign and form ordered crystalline regions. This is called <span class="def-term" data-term="starch-retrogradation">starch retrogradation</span> and often makes baked goods feel grainy or dry. Wheat-based flours and corn starch have a relatively lower ratio of amylopectin and therefore stale faster, which is why I don’t use corn starch in my cakes anymore. I use sweet rice flour instead.
What ingredients will you need to make my Mochi Muffins?
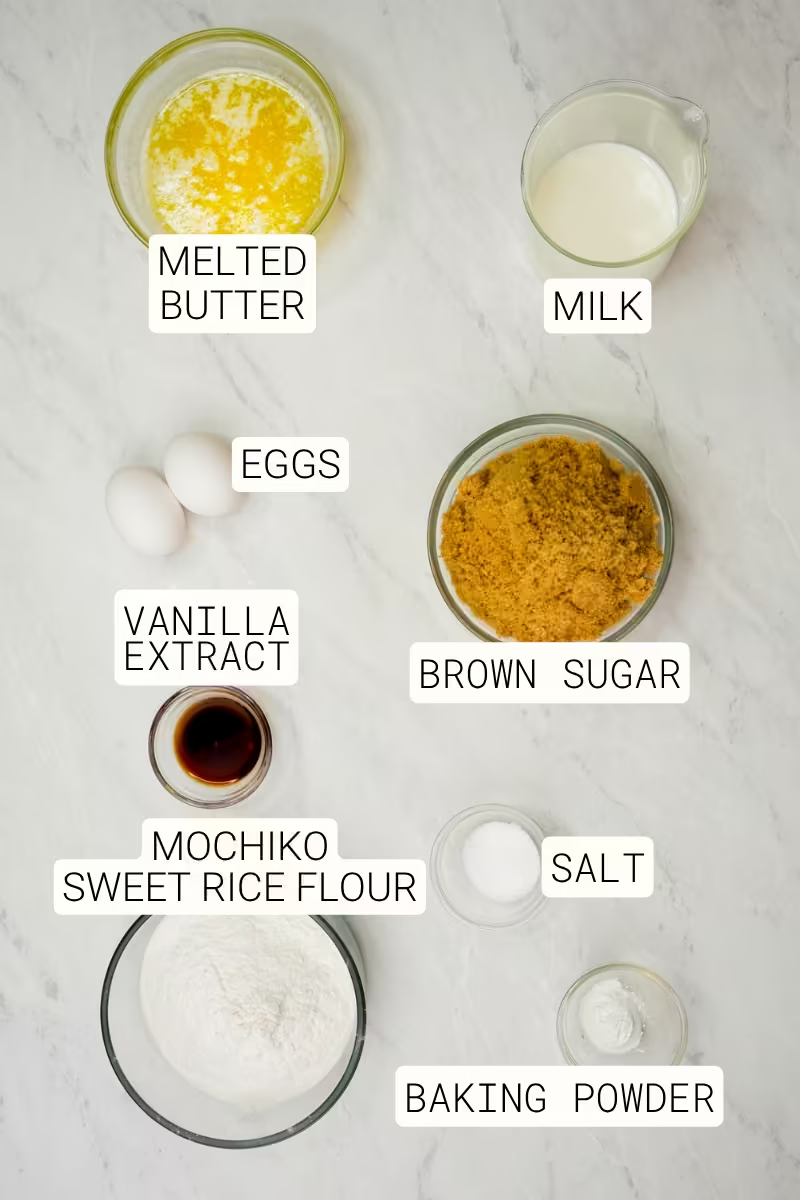
UNSALTED BUTTER is the source of fat for this recipe and adds rich flavor and texture to the muffins.
WHOLE MILK provides moisture, proteins, and fat that create a tender crumb. It’s important to use warm milk as this helps prevent the melted butter from solidifying.
WHOLE EGGS provide structure, richness, and emulsifying power. As their proteins <span class="def-term" data-term="coagulation">coagulate</span> during baking, they help the muffins set, while the yolks contain lecithin, a natural <span class="def-term" data-term="emulsifier">emulsifier</span> that keeps the butter and milk evenly blended.
BROWN SUGAR is the primary source of sweetness for these muffins. I like brown sugar rather than white sugar as it adds a bit of flavor complexity to the muffin. It also helps retain moisture, resulting in a softer texture. Its molasses content is hygroscopic, meaning it attracts and holds water. I’ve used light brown sugar for this recipe, but feel free to sub out dark brown sugar, which has a tad more molasses.
VANILLA EXTRACT and SALT are flavor enhancers that bring out the aromatic compounds in the dairy.
GLUTINOUS SWEET RICE FLOUR (MOCHIKO) provides the muffins' signature chewy, springy texture. Despite its name containing “glutinous”, it contains no gluten, and the naming convention refers to its cooked texture, which is typically chewy and elastic. It is composed primarily of amylopectin-rich starch, which is largely responsible for the gooeyness of mochi-based desserts.
I have two types of glutinous sweet rice flour in my pantry - one is Erawan Sweet Rice Flour (also commonly referred to as the “Thai sweet rice flour with the green label,” which differentiates it from the Thai rice flour with the red label). Theoretically, one should be able to use Erawan Sweet Rice Flour to make these mochi muffins, since it is commonly used in Thai desserts to achieve a similar chewy texture, but I haven’t tried it. I always use the Koda Farms Mochiko Sweet Rice Flour, which is made from Japanese Sweet Rice grown in California.
BAKING POWDER is the leavening agent that helps the muffins rise. When hydrated and heated, it releases carbon dioxide gas and gives the muffins a more aerated texture.
Step by step:
STEP 1 | PREPARE THE OVEN AND MUFFIN PAN.
Move an oven rack to the center position and preheat the oven to 375°F. Spray a standard 12-cup muffin pan with cooking oil.
STEP 2 | WHISK TOGETHER THE DRY AND WET INGREDIENTS
WHY:
To make these mochi muffins, we are going to use a single-stage mixing method that involves making dry- and wet-ingredient mixtures, which we then combine. It’s one of the easiest mixing methods but it's not as simple as dumping ingredients into a bowl and mixing it haphazardly. If you want the best result, it’s worth learning that there is a bit of nuance to this method and once you understand these little bits, then yes, it’s very easy!
The logic behind this method for this recipe is that we build an <span class="def-term" data-term="emulsion">emulsion</span> first with the wet mixture. This evenly disperses the fat and water into a singular liquid component that serves as a foundation for the batter. Little details like room temperature eggs, melted butter, and warm milk all facilitate the formation of this emulsion. If any of these ingredients are cold, they could solidify the butterfat, which will prevent the emulsion from forming.
Then we add all the dry ingredients a little at a time to spread the flour and leavening throughout the liquid emulsion so the muffins bake up into an evenly sized and distributed crumb.
So the name of the game is dispersion. We want an even distribution of the flour within the fat and oil emulsion.
To start, we’ll mix the flour and baking powder in a bowl to ensure the baking powder is evenly distributed. Then we’ll add the wet ingredients together in a larger bowl. I like to start with the strongest parts of the emulsion first, which are the butter and eggs, to hold everything together.
HOW:
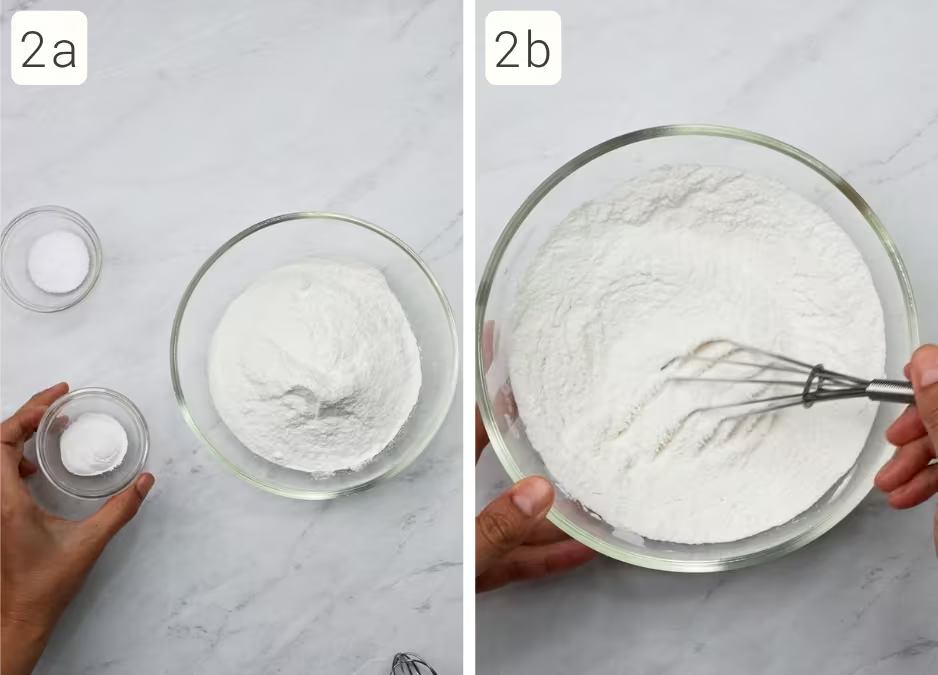
In a small bowl, whisk together the flour, baking powder, and salt (2a, b).
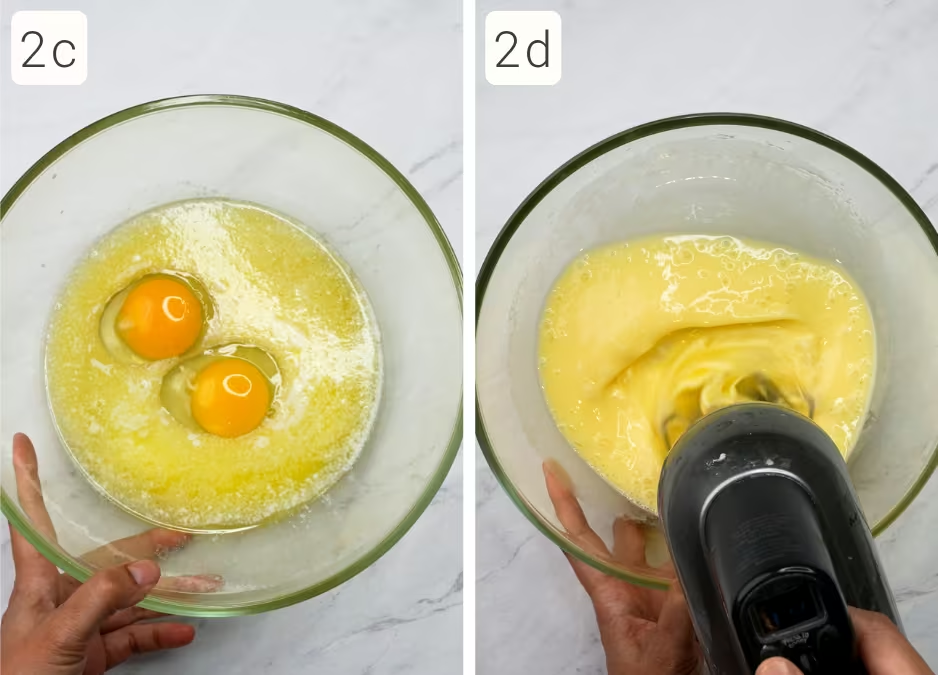
To a large mixing bowl, add the melted butter and the eggs (2c). Mix until fully emulsified and no separation of milk and butterfat is visible (2d).
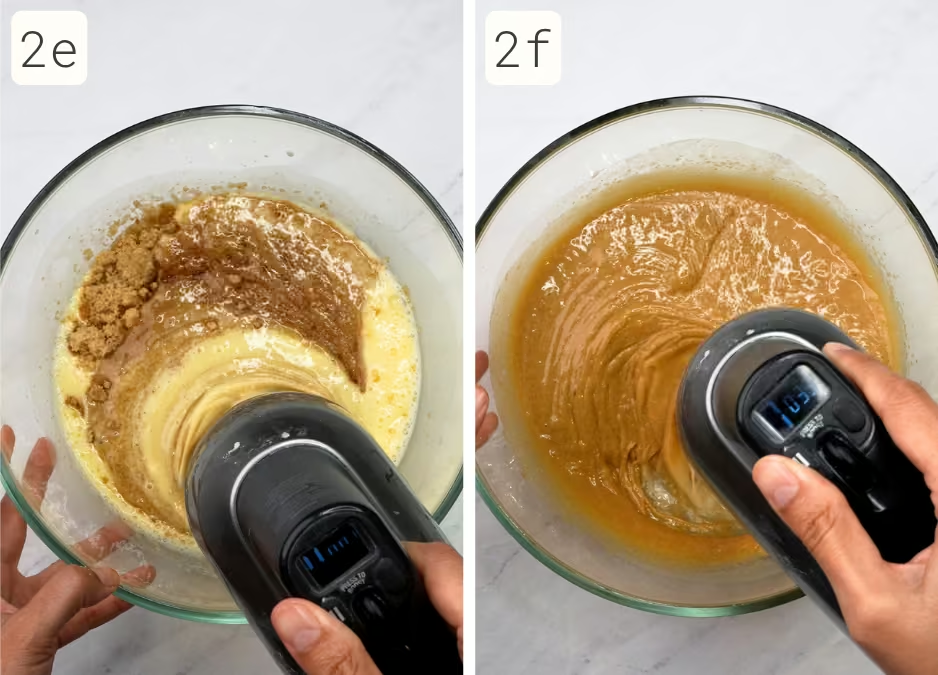
Add the brown sugar and vanilla until fully incorporated (2e, f).
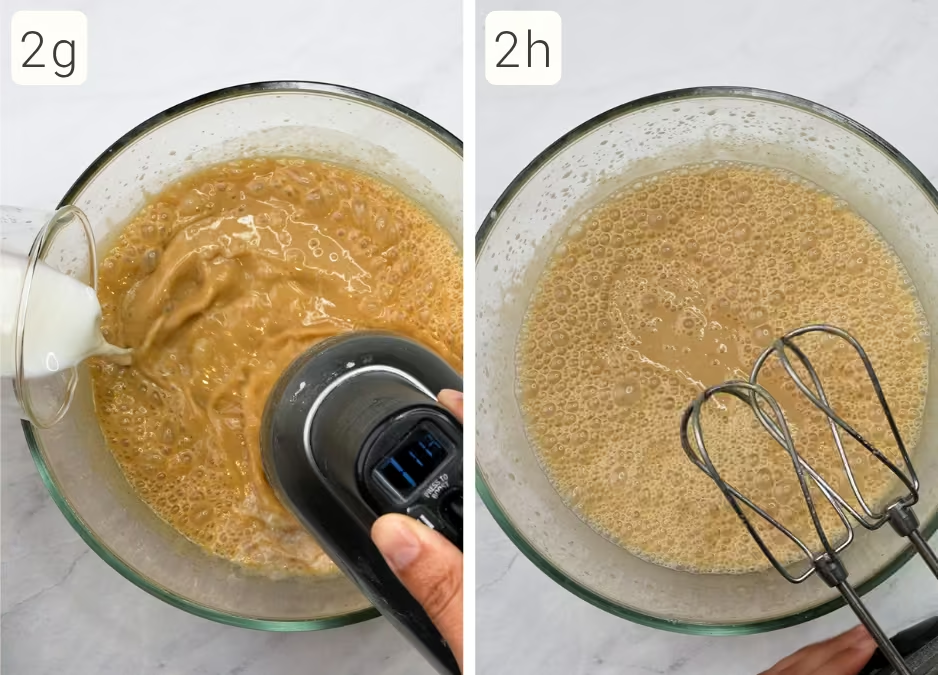
Add the warm milk a little at a time until fully incorporated (2g). The mixture should be very liquid, light brown from the sugar, and perhaps a bit frothy from all the mixing (2h).
STEP 3 | COMBINE THE WET AND DRY MIXTURES.
WHY:
Because we built an emulsion in the wet ingredient mixture, all we have to do now is combine it with the dry so it can fill in all the gaps within the emulsion. This, in turn, creates a more even crumb structure for the final muffin. The cool thing about this recipe is that it’s gluten-free (<span class="def-term" data-term="gluten">gluten</span> is a protein matrix made from wheat-based proteins), so all that worrying about overmixing the batter to inhibit gluten formation goes all out the window. Mix, mix, mix on high speed until everything is fully combined. In fact, the more evenly mixed, the better, as this creates a more even crumb structure.
HOW:
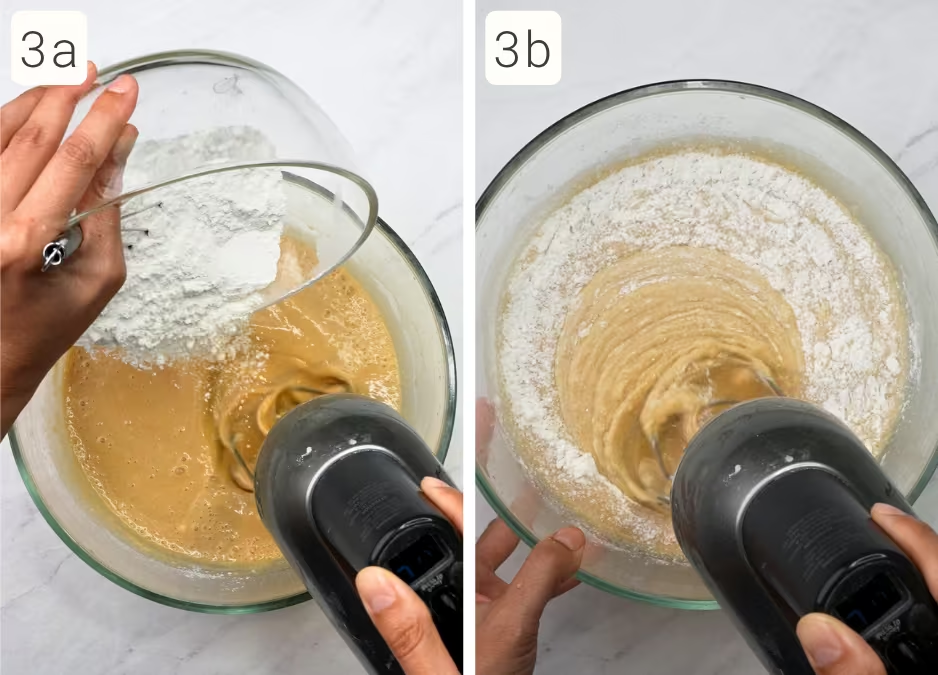
Add the flour mixture to the butter-egg-milk mixture in about 3 additions, mixing on medium speed until no flour remains (3a, b).
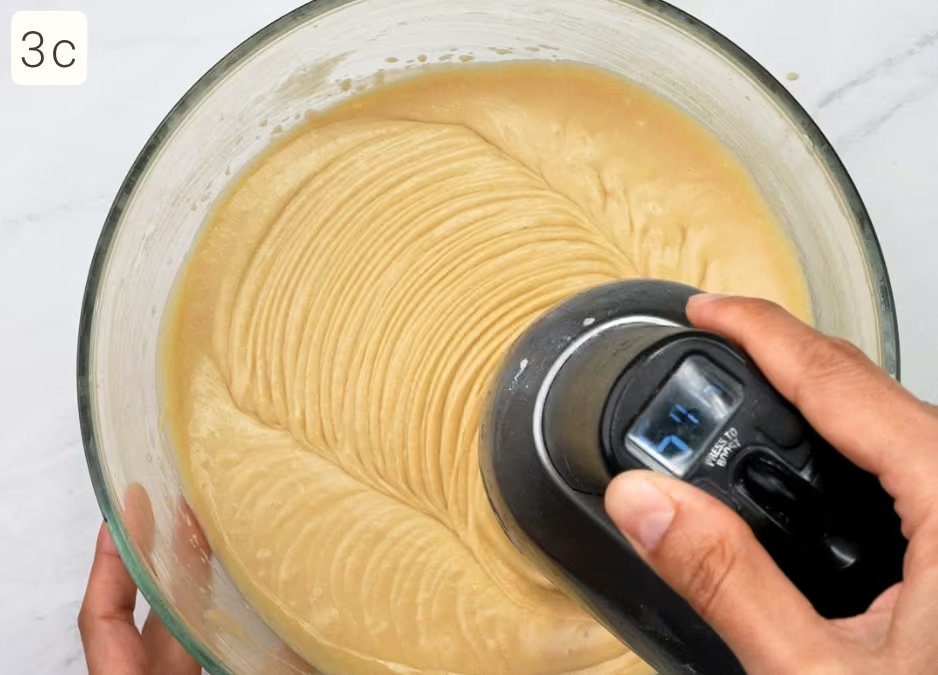
After all the flour has been added, mix for an additional 2 minutes on medium-high speed. The batter should be thicker and will be slightly grainy from the uncooked rice flour (3c).
STEP 4 | FILL THE PAN AND BAKE.
WHY:
With muffins, we typically want to fill the muffin pans pretty full. This encourages a more rounded top. For mochi muffins, we are not going to get nearly as much rise as a conventional, say, blueberry wheat-based muffin. So don’t be shy about filling each muffin cup nearly full.
And what about muffin liners/papers/cups? We don’t need them because first, we’ve oiled the interior of the pans. Also, this is a lower sugar recipe, and sugar is usually the main culprit for baked goods sticking to baking pans. And last - we want to encourage browning on the exteriors. The <span class="def-term" data-term="maillard-reaction">Maillard reaction</span>, which occurs in earnest at temperatures above 330°F/166°C, is what causes the browned, yummy toasted exteriors of these muffins, and their contact with the hot metal pan encourages that to happen much more quickly. When you add a liner, it’s a form of protection from the hot metal pan, which is great for high-sugar, delicate-crumbed cupcakes, but not necessary for our sturdy mochi muffins.
HOW:
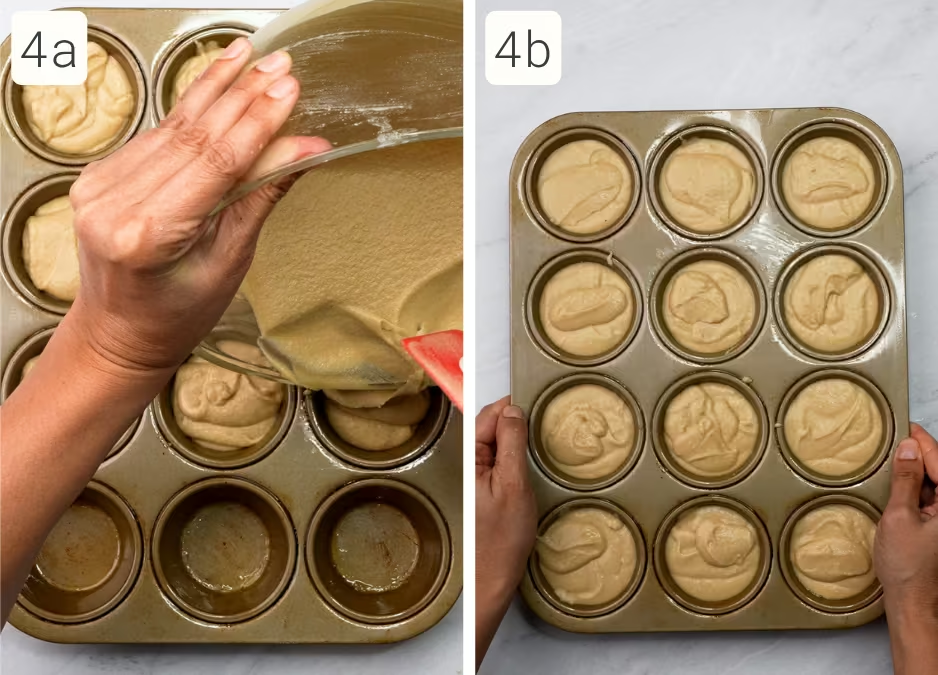
Fill each cavity of the prepared muffin pan to about 90% full with batter (4a, b).
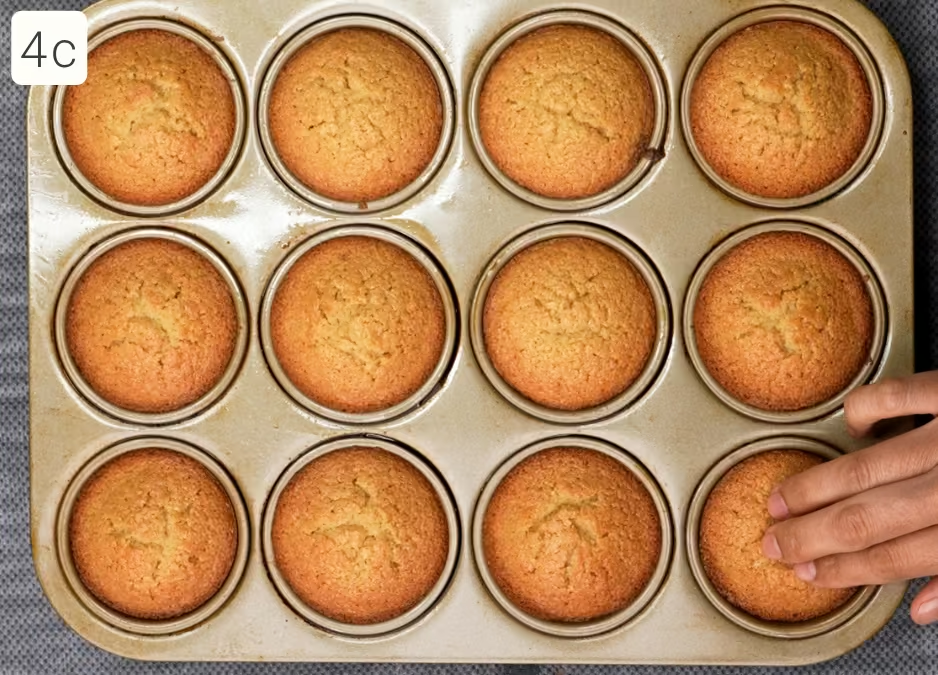
Bake for 20–25 minutes. The muffins are done when the tops are lightly domed and toasted (4c). If using an instant-read thermometer, the centers should register about 205°F/96°C.
STEP 5 | COOL AND UNMOLD.
WHY:
Allowing the muffins to cool briefly gives their structure time to firm up, making them easier to remove without tearing. As they cool, the tops naturally shrink slightly as steam escapes and the crumb finishes setting.
HOW:
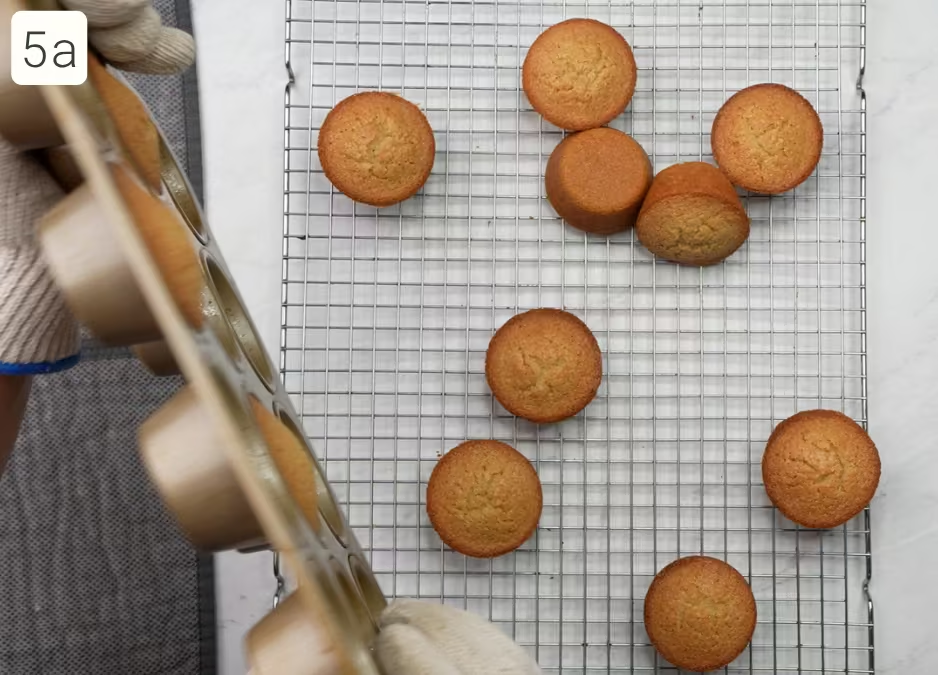
Allow the muffins to cool in the pan for about 5 minutes. Run a butter knife around the edge of each muffin, then invert the pan over a cooling rack (5a). Don’t worry - these are sturdy muffins, so just go ahead and turn that pan over and shake the muffins out if you need to!
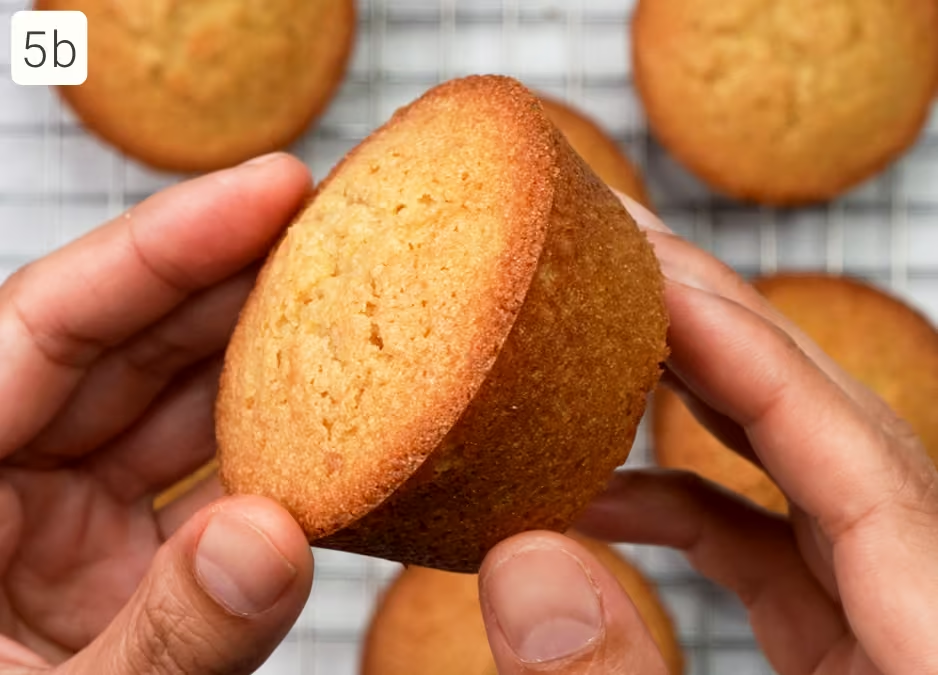
Turn them right side up and allow them to cool completely (5b).
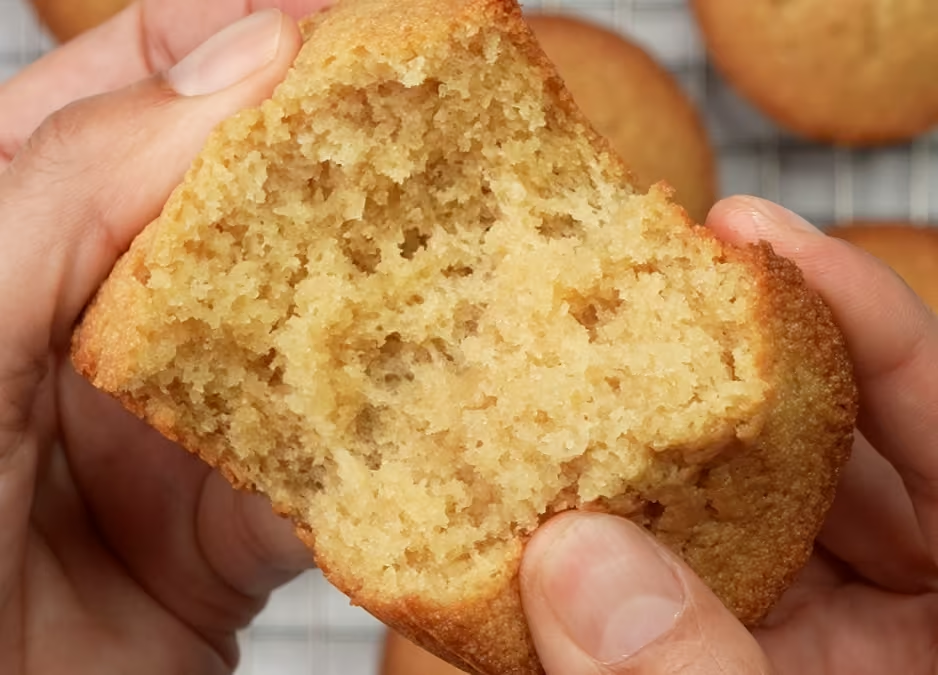
💡TIP: Do you want to know my favorite way to eat these? Right after they’ve cooled a bit, I place the warm muffins onto a plate and into the freezer. (I know it’s not good to place hot foods into the fridge and freezer, but I love this so much that I make room in my freezer to do this.) I leave them there for about 5-10 minutes.
After that time, the crust should be a little cold. Not frozen, but cool to the touch. The centers, however, are still quite warm. The fast cooling prevents water migration from the very moist centers and allows the crusts to form crunchy shells because of all the butterfat. So what you get is a crunchy shell of buttery goodness encasing a slightly warm, chewy center. You can really only do this right after they’re baked, so I usually do a couple muffins for myself as a little baker's treat :)
Video
Honors Members Section
This extra material is accessible to Sugarologie Honors members.
Become a member to view extended research notes, technique analysis, and supplemental materials! Learn more about Sugarologie Honors here.
Already a member?
Hi Honor’s Member! I hope you enjoy this recipe. Since you’re an Honors Member, I try to provide you with more in-depth ideas about my recipes that I develop. And since this is my base recipe for mochi muffins, it is ripe for innovation and customization.
Of all the recipes on my site, this is by far one of the easiest to modify. It’s really simple to throw together and high-hydration. Generally, high-hydration recipes have a big window of opportunity because lots of flavorful ingredients can fit in place of the water in a recipe. In this recipe, it’s the milk, which makes up more than half of the water in the recipe.
The key here is to always use weights for substitutions - so if you’re subbing out the milk, you’re going to weigh out 192 grams of whatever you’re replacing it with.
- A level 1 modification is the easiest and would be to sub out the vanilla extract - and one I’m excited to try would be ube extract instead of vanilla.
- A level 2 modification would be to sub out the milk for a high-water ingredient, such as coffee, strongly brewed tea, matcha brewed in milk, a low sugar fruit juice, or plant-based milks.
- And level 3 would be subbing out the milk for a high-moisture-content fruit or vegetable puree. Good ones to try include pumpkin puree, applesauce, mashed banana, ube puree, or butternut squash. This will inevitably add extra components to the recipe, such as excess sugars, fibers, proteins, and starches, but this recipe is pretty forgiving and can handle a fair amount of change while still being quite chewy and delicious.
I have yet to try any of these - but I will post them if I come up with a custom version. Good luck and have fun!
Before starting the recipe, please read this!
Measure by weight, if possible.
Measuring by weight is the best way for you to replicate my recipes. I develop recipes using ingredients (even liquids) measured in grams, which is why you see them listed first in the recipe cards. For measurements under 5 grams, I will typically only list the volumetric measurements (teaspoons, etc.), as most home scales are not precise for such small weights.
In most cases, I have converted grams to volumetric measurements (aka US customary units) for bakers who prefer this method. However, the measurements are not as precise and may have awkward proportions. The recipes should still work, but for the ultimate precision, try to use weight.
This is the OXO scale I use daily. I also purchased this budget version of a good scale, which I keep at my Mom’s house for baking. If you’re interested in other tools I use for my baking, I’ve compiled a list here.
Use room temperature ingredients.
All my ingredients should be used at room temperature, or 65-75 °F/18-24 °C. I will always indicate if you need something outside this range. If no details are given, room temperature is the default.
Pay attention to the ingredient descriptions.
I try not to be brand-specific, but I will always note an interesting result from a type of ingredient, be it negative or positive.
A specific note regarding salt: I use Diamond Crystal Kosher salt for everything on this site except for frostings. In frostings, you want the salt to dissolve more easily, and kosher salt tends to leave granules behind. If you substitute table salt (more finely granulated) for recipes that list kosher salt, you must use half the volume indicated in my recipes.
Substitutions are hard.
That said, substitutions aren’t impossible but can be the toughest part of recipe development. Small swaps, like reduced-fat milk (2% fat) for whole milk (3.5% fat), usually work fine. However, bigger changes—such as replacing oil with applesauce or sour cream with Greek yogurt—can significantly impact texture and density.
Be wary of general, all-purpose substitutions in baking; I find that usually there is never a one size-fits-all solution. I carefully select ingredients for my recipes, so for the best results, start with the original recipe and modify with caution.
Read all the recipe instructions before beginning.
I’m in the “Pre-read the Chapter before Class Lecture” club... and I invite you to join! Baking new recipes can be intimidating, so let’s set you up for success. I want you to think about timeframes. Most fillings and frostings can be made ahead of time, and give you an extra day for mental space. Also, as you become a more proficient baker, you can anticipate and recognize steps. (“Oh, this has a meringue step, so I’ll need an extra clean bowl…” etc.) Ensure you go down the ingredient list and have everything at the right temperature.

.avif)
.avif)
.png)

Buttery Mochi Muffins
- 300 g (1 ¾ cups + 2 tablespoons) glutinous sweet rice flour* (mochiko)
- 1 ½ teaspoons baking powder
- 1 ½ teaspoons kosher salt
- 140 g (10 tablespoons) unsalted butter, melted
- 100 g (2 large) whole eggs, at room temperature
- 252 g (1 cup + 3 ½ tablespoons) light brown sugar**
- 15 g (1 tablespoon) vanilla extract
- 192 g (¾ cup + 1 tablespoon) whole milk, 100-105°F (38-41°C)
- 300 g (1 ¾ cups + 2 tablespoons) glutinous sweet rice flour* (mochiko)
- 1 ½ teaspoons baking powder
- 1 ½ teaspoons kosher salt
- 140 g (10 tablespoons) unsalted butter, melted
- 100 g (2 large) whole eggs, at room temperature
- 252 g (1 cup + 3 ½ tablespoons) light brown sugar**
- 15 g (1 tablespoon) vanilla extract
- 192 g (¾ cup + 1 tablespoon) whole milk, 100-105°F (38-41°C)
- Prepare the oven and muffin pan.
Move an oven rack to the center position and preheat the oven to 375°F. Spray a 12-cup standard muffin pan generously with cooking oil. - Prepare the wet ingredients.
In a small bowl, whisk together the sweet rice flour, baking powder, and salt.
To a large mixing bowl, add the melted butter and the eggs. Mix until fully emulsified and no separation of milk and butterfat is visible.
Add the brown sugar and vanilla until fully incorporated.
Add the warm milk a little at a time and continue to mix until everything is well combined. The mixture should be very liquid, light brown from the sugar, and perhaps a bit frothy from all the mixing.
- Add the dry ingredients.
Add the flour mixture to the butter-egg-milk mixture in about 3 additions, mixing on medium speed until no flour remains.
After all the flour has been added, mix for an additional 2 minutes on medium-high speed. The batter should be thicker and slightly grainy from the rice flour but you should see no residual flour clumps. - Fill the pan and bake for 20-25 minutes.
Fill each cavity of the prepared pan to about 90% full with the batter.
Bake for 20-25 minutes. You’ll know the muffins are done when they are slightly domed and toasted on their tops. If you have an instant-read thermometer, the centers should register about 205°F.
Allow the muffins to cool for about 5 minutes in the pans. The tops will shrink down a bit during this time. Run a butter knife along the edge of each muffin and invert the pan over a cooling rack. The muffins should fall right out. Turn the muffins right side up and allow them to cool completely.
STORAGE: Sweet rice flour tends to stay chewy and moist more reliably than baked goods using wheat-based flours, so you should be able to store these muffins in an airtight container for at least a couple of days. After the first day, however, you will lose the firm crust as the water from the centers will naturally migrate to the drier crusts.

Recipe Card - Adriana's Notes
*I use Koda Farms Sweet Rice Flour (Amazon link here).
**You can use dark brown sugar here as well.
.avif)
.avif)

Got room for more dessert?
Subscribe to my Crumby Data newsletter! I share behind-the-scenes looks at recipe development, flavor testing for the Cakeculator, and life as a content creator. It’s free, lands in your inbox every few weeks, and you can unsubscribe anytime...no strings attached :)
Feel free to take a look at previous newsletters here!

.ico)