.avif)
Decadent Chocolate Cupcakes with Rich Chocolate Buttercream


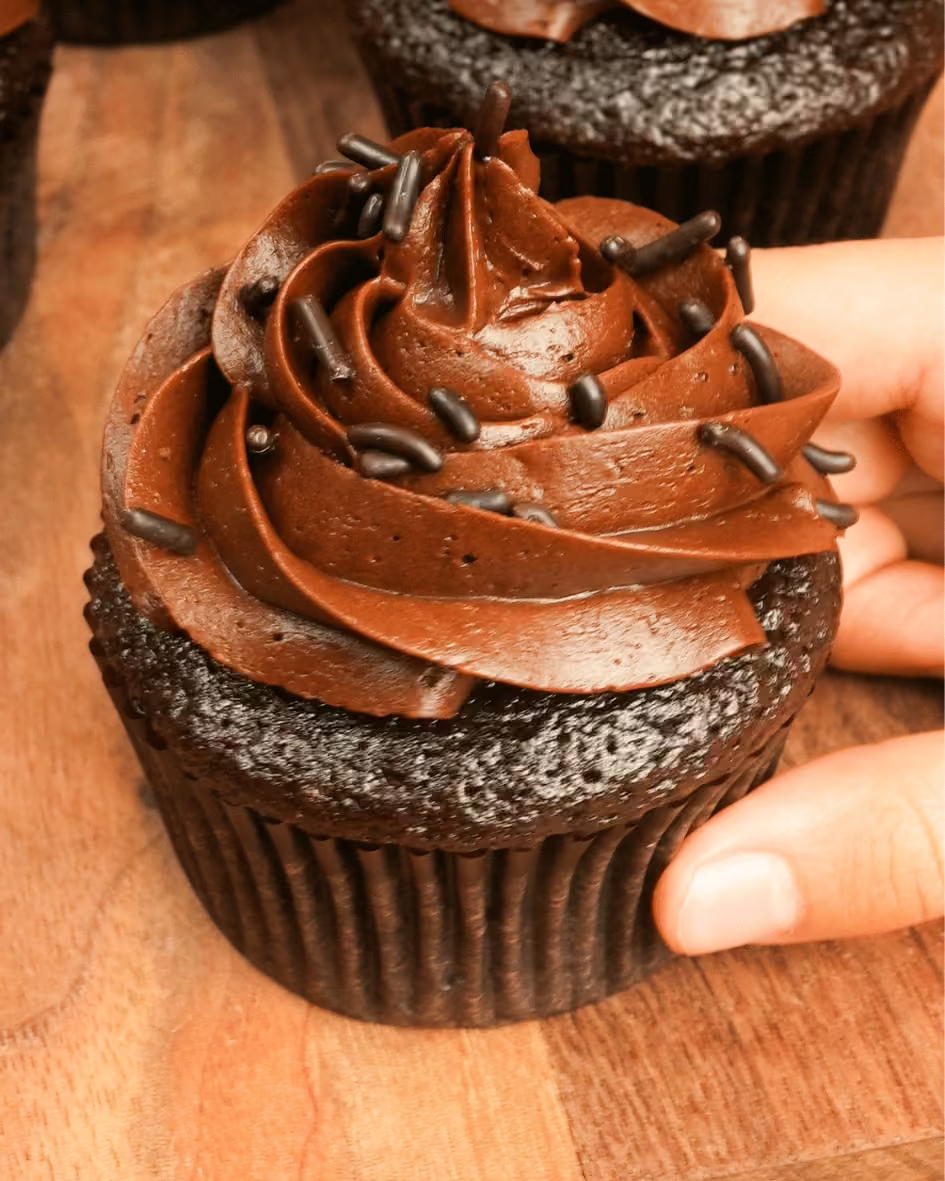
My decadent chocolate cupcakes feature a super-moist chocolate cake full of deep, rich chocolate flavor and are topped with a creamy, chocolate-forward buttercream. This is an ideal beginner-friendly recipe: the chocolate cake is made with just a bowl and whisk, and the chocolate frosting is easy to make with a hand mixer. With minimal effort and deliciously impressive results, these chocolate cupcakes are a highly rewarding recipe to make for all the chocolate lovers in your life.
Unlike dry or overly sweet chocolate cakes, my recipe is designed to highlight cocoa flavor and a fudgy textures.
We’ll use Dutch-processed cocoa in both the cake and the frosting to achieve a rich chocolate depth. In addition, I’ve formulated an oil-based batter that typically yields a tighter, denser crumb and is perfect for the fudgy texture I was aiming for. For the buttercream, we’ll use the American Dreamy Buttercream method, but instead of emulsifying a sugar syrup, we’ll add some melted chocolate to create the richest, creamiest buttercream.
At the time of this writing (early 2026), chocolate has become very expensive as a baking ingredient. I consider those things when creating recipes, so my buttercream can be made using chocolate chips, which are typically cheaper than bar chocolate. You can also use bar chocolate, of course, and I’ll annotate that below. As for the cocoa powder, you can use any Dutch-processed cocoa you like. My favorite brand, Droste, has gone out of business, so I’ve been using Rodelle Dutch-processed cocoa powder, which has a very nice flavor, and is relatively inexpensive when I buy it at my Costco.
What is the texture and flavor of this chocolate cupcake?
Combining this cake and frosting creates the most decadent chocolate cupcake experience.
So let’s break down the components and talk about texture and flavor. This is my Chocolate Indulgence cake, a recipe I created to satisfy my love for rich chocolate flavors.
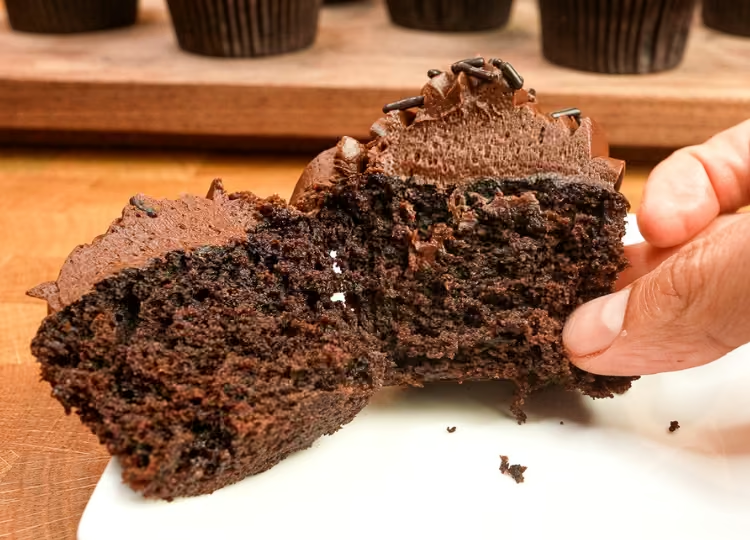
Texturally, this is a fudgy, creamy chocolate cake. As an oil-based cake, it has a very moist, dense crumb.
Flavor-wise, it’s got a not-too-sweet, deep chocolate flavor. This is due to the high ratio of Dutch-processed cocoa powder, which imparts a mellow chocolate flavor and slightly red hue in the cake crumb. (Can you see it?) I bake almost exclusively with Dutch-processed cocoa because it delivers a fantastic chocolate aroma. All of this is due to the alkalization process the cocoa powder undergoes, which, amongst many other things, changes its color and flavor.
As for the frosting, this is my Chocolate American Dreamy Buttercream. I rank my chocolate frostings by chocolatey-ness, and, for reference, something like chocolate whipped cream would be low-intensity, while a whipped chocolate ganache would be high-intensity. .This is one I’d consider moderately high in chocolate intensity because it uses a combination of cocoa powder and melted chocolate, which is then emulsified into whipped butter.
Step by step:
STEP 1 | BAKE THE CHOCOLATE INDULGENCE CUPCAKES
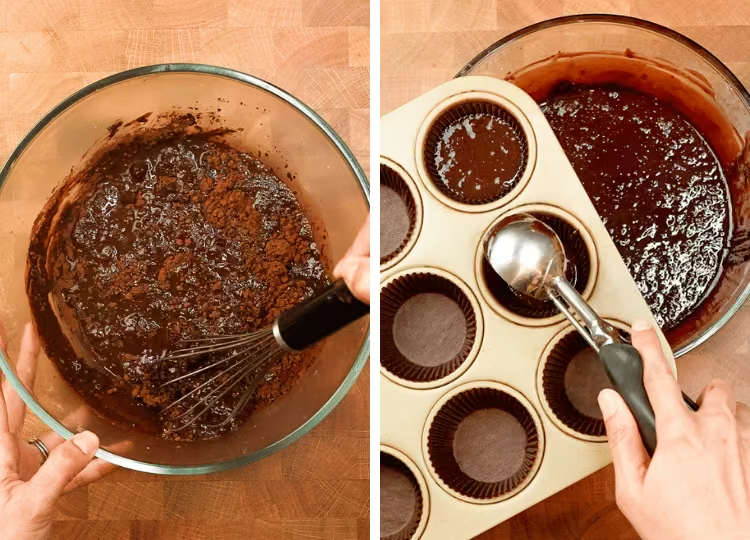
For the chocolate cake batter, you’ll need just one bowl and a whisk.
First, the cocoa powder is bloomed in boiling water, and then the ingredients are added one by one directly into the same large bowl. You may see slight bubbling during this process - that’s the alkalization agent in the Dutch-processed cocoa interacting with the molasses in the brown sugar.
And it’s great to get that sort of bubbling early on, as it helps with aeration. With oil-based cakes, aeration depends on this brief mixing step rather than creaming solid butterfat and sugar, a popular mixing technique (aka the creaming method) you may also be familiar with. Also, because this is oil-based, you’ll notice it’s a very runny batter. If you have a bowl with a spout, that's great because you can pour the batter into each cupcake liner, but a scoop works well too.
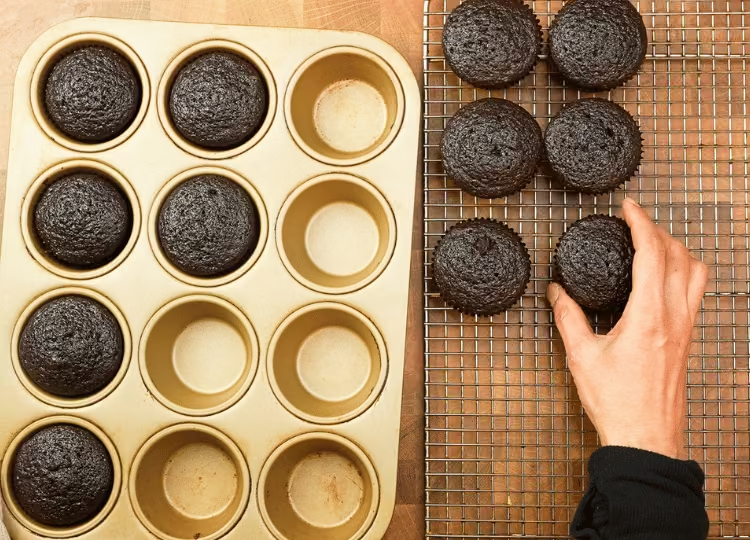
You’ll bake this tray of cupcakes for around 20 minutes. You’ll know they’re done when you see a slight doming above the liner with some air holes dotted all along the surface. The tops will be nice and shiny because we pre-gelatinized the cocoa powder in boiling water before baking. It’s the same reason bagels are shiny: they're also boiled before baking.
But don’t worry, unlike bagels, the interior will be super moist and tender with a fall-apart crumb. Which, by the way, I mentioned earlier: this is one of the easiest recipes on my site, and that’s because chocolate cakes are *very* forgiving. If you underbake them (either accidentally or intentionally), you get a slightly fudgy center, which is actually quite lovely. Overbaking is pretty difficult, though not impossible 🙂, but because of the high fat, moisture, and sugar ratios, you’ll probably still end up with a superb chocolate cake.
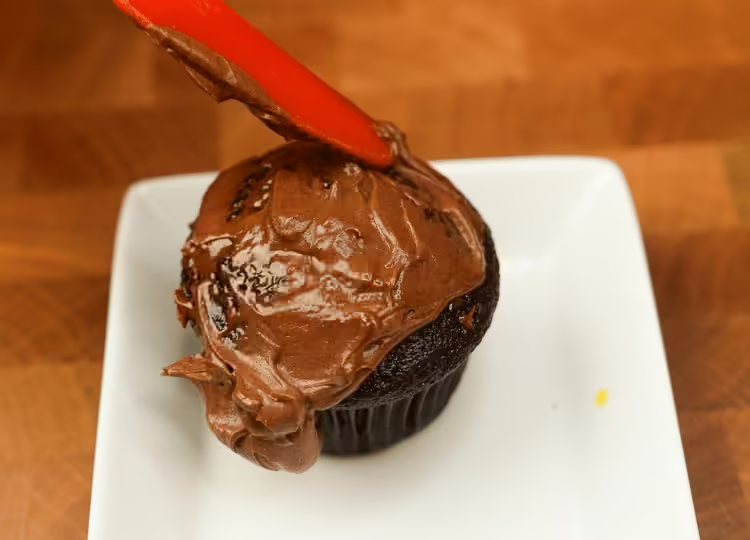
Remember to let your cakes cool completely before adding any frosting. My daughter was anxious to have a cupcake, and this one was just barely warm. I let her have some frosting to play with, and you can see that even a slight bit of warmth will liquify the buttercream. Still delicious though!
STEP 2 | MAKE THE CHOCOLATE AMERICAN DREAMY BUTTERCREAM
My Chocolate American Dreamy Buttercream is based on my Vanilla American Dreamy Buttercream, with the premise that you take a sugar syrup and emulsify it into butter.
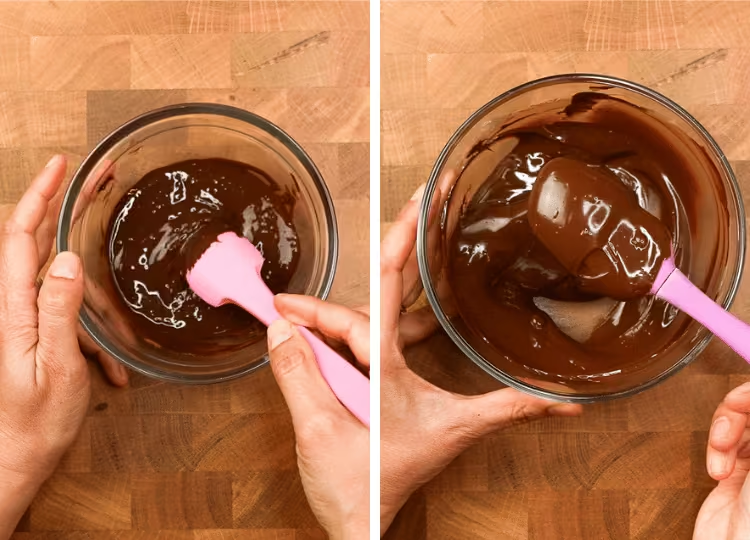
For this chocolate version, the syrup is a combination of hydrated cocoa powder paste and melted chocolate. I know the photographs above look similar, but the one on the left is hydrated cocoa powder, and the one on the right is melted chocolate.
First, you’ll need to make the cocoa powder paste (shown on the left) by mixing Dutch-processed cocoa powder with boiling water. On the right is a bowl of melted semi-sweet chocolate chips. Each is essential for flavor and stability in the final buttercream, albeit in different ways, which is why we need both.
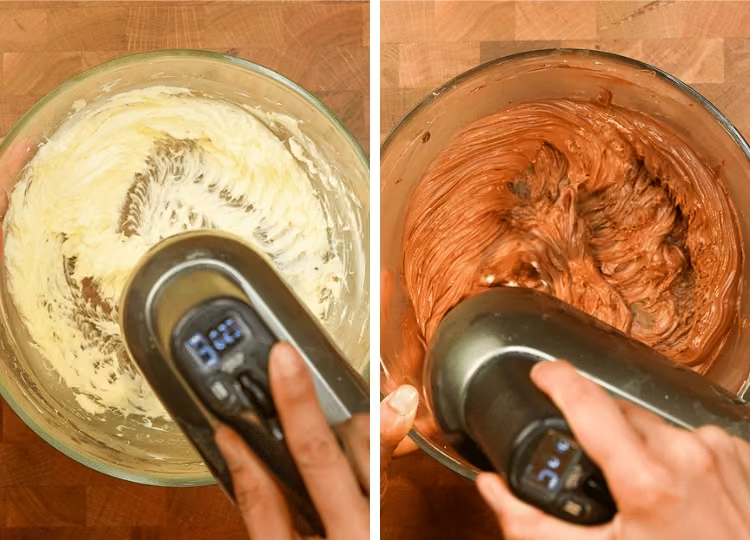
Next, you’ll need to whip up some butter. You can use a hand mixer or a stand mixer for this part. Then add both the cocoa powder paste and the melted chocolate to the whipped butter after they’ve cooled slightly. Then add some sweetener via powdered sugar and salt for flavor.
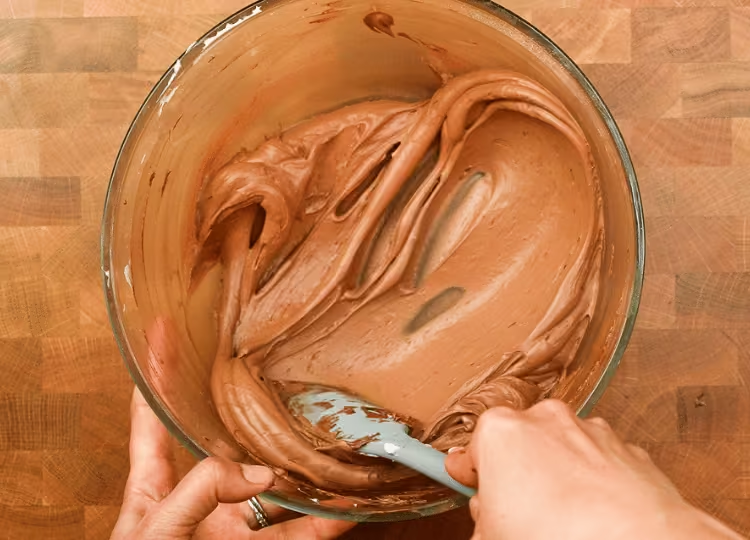
At this point, you get a smooth buttercream, but you may notice it’s a little loose - this depends on the type and flavor of your chocolates. Don’t worry! This is normal. You can either place it in the fridge or let it sit out until it stiffens up a bit.
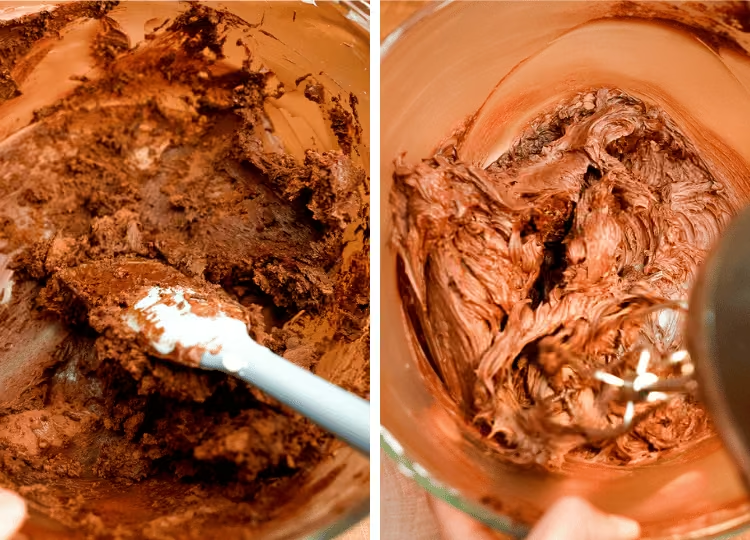
You can see in the photo on the left that the frosting looks a little stiffer, rougher, and not smooth. If you run your spatula through, it will definitely feel thicker. Just mix on high speed to smooth things out (see photo on the right).
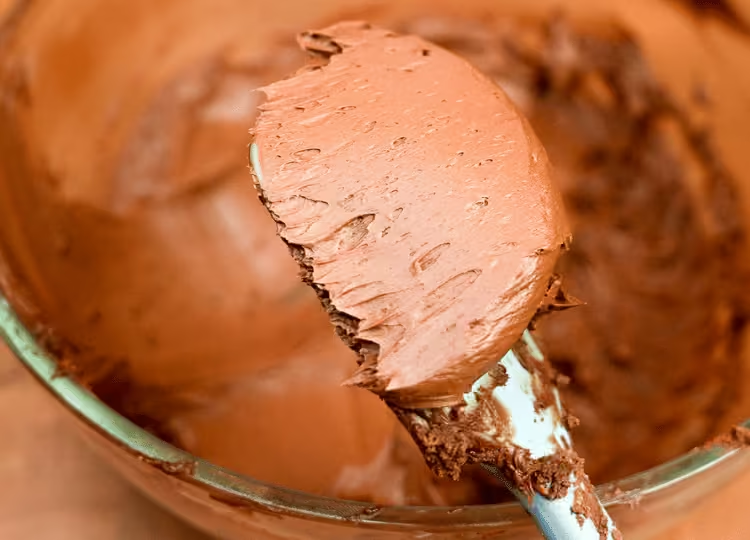
The frosting should now be smooth, thick, and creamy for piping or swirling onto your cupcakes.
STEP 3 | FROST THE CUPCAKES
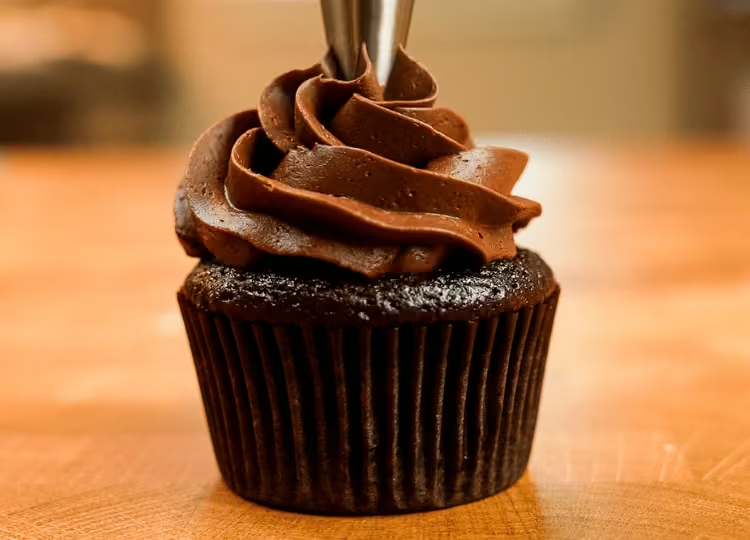
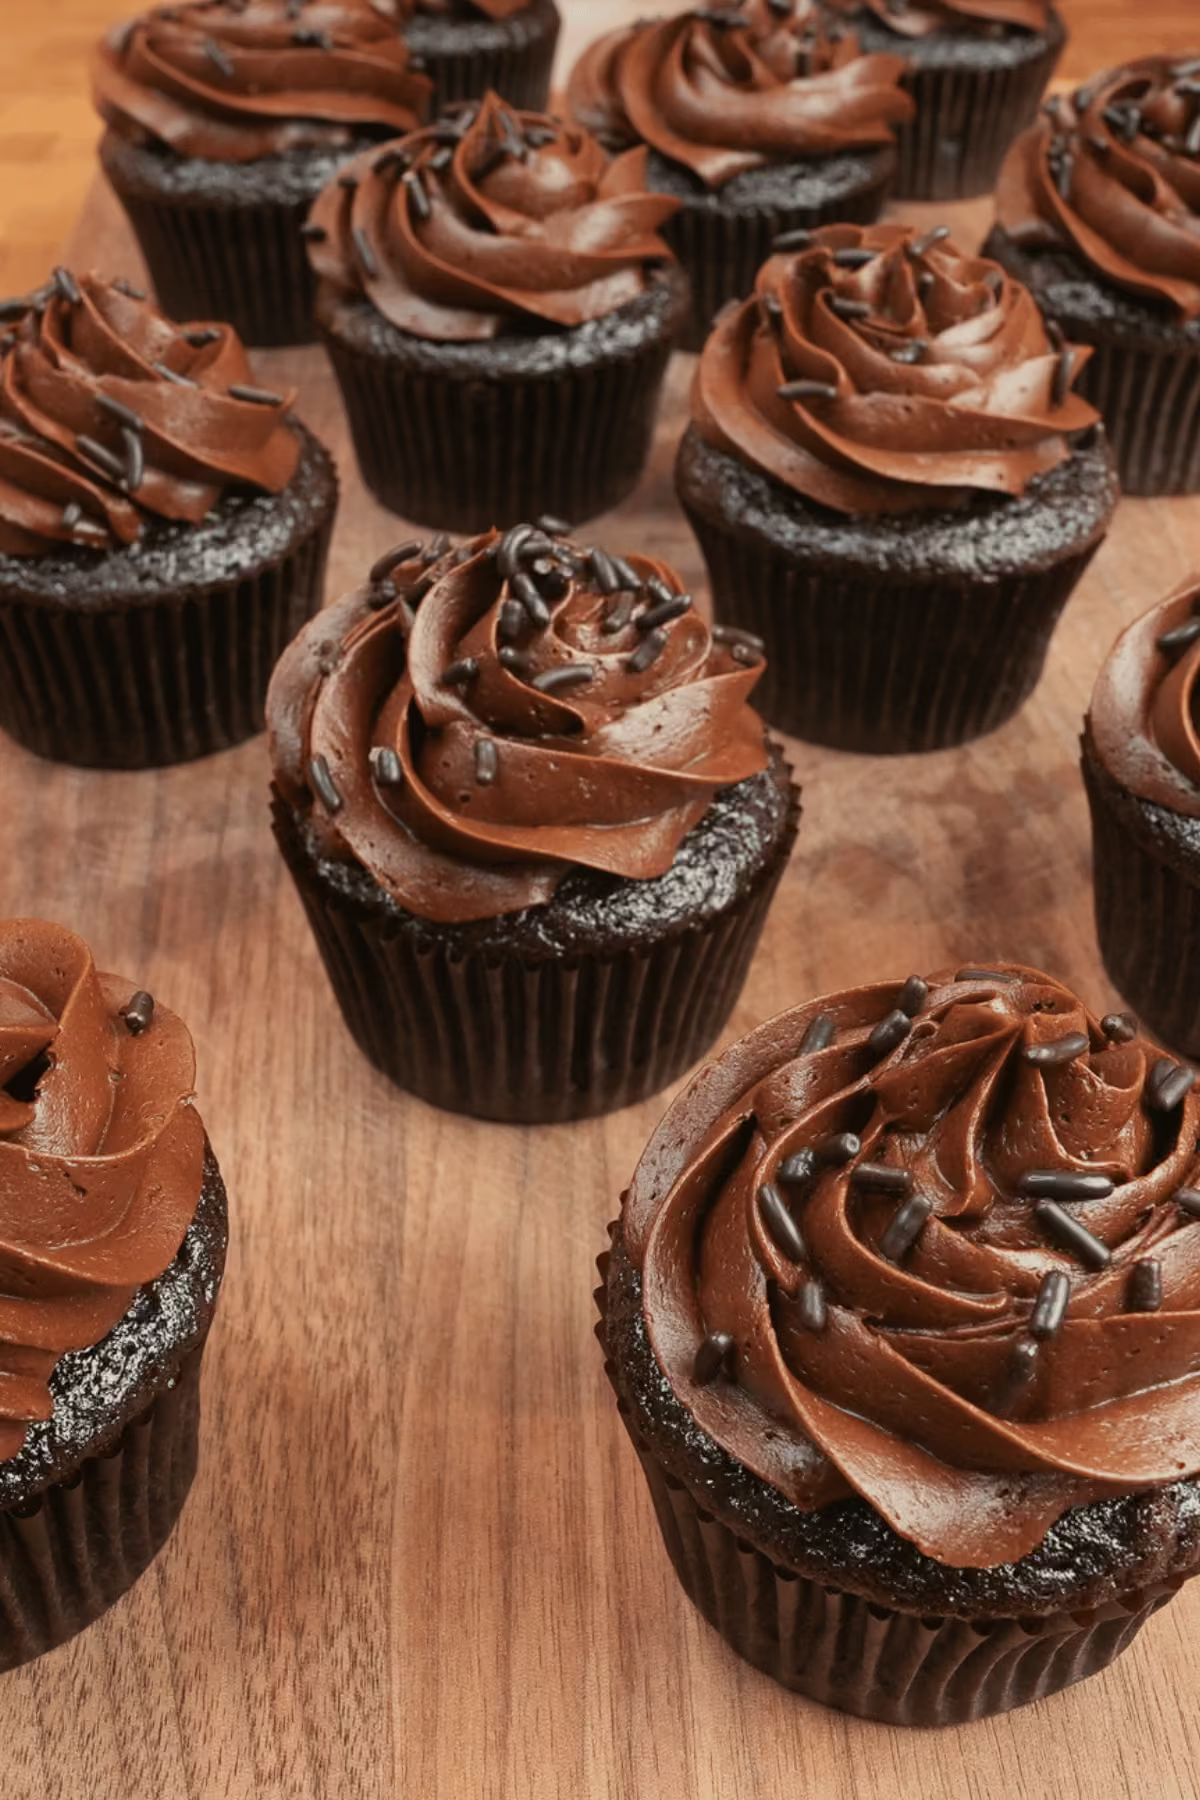
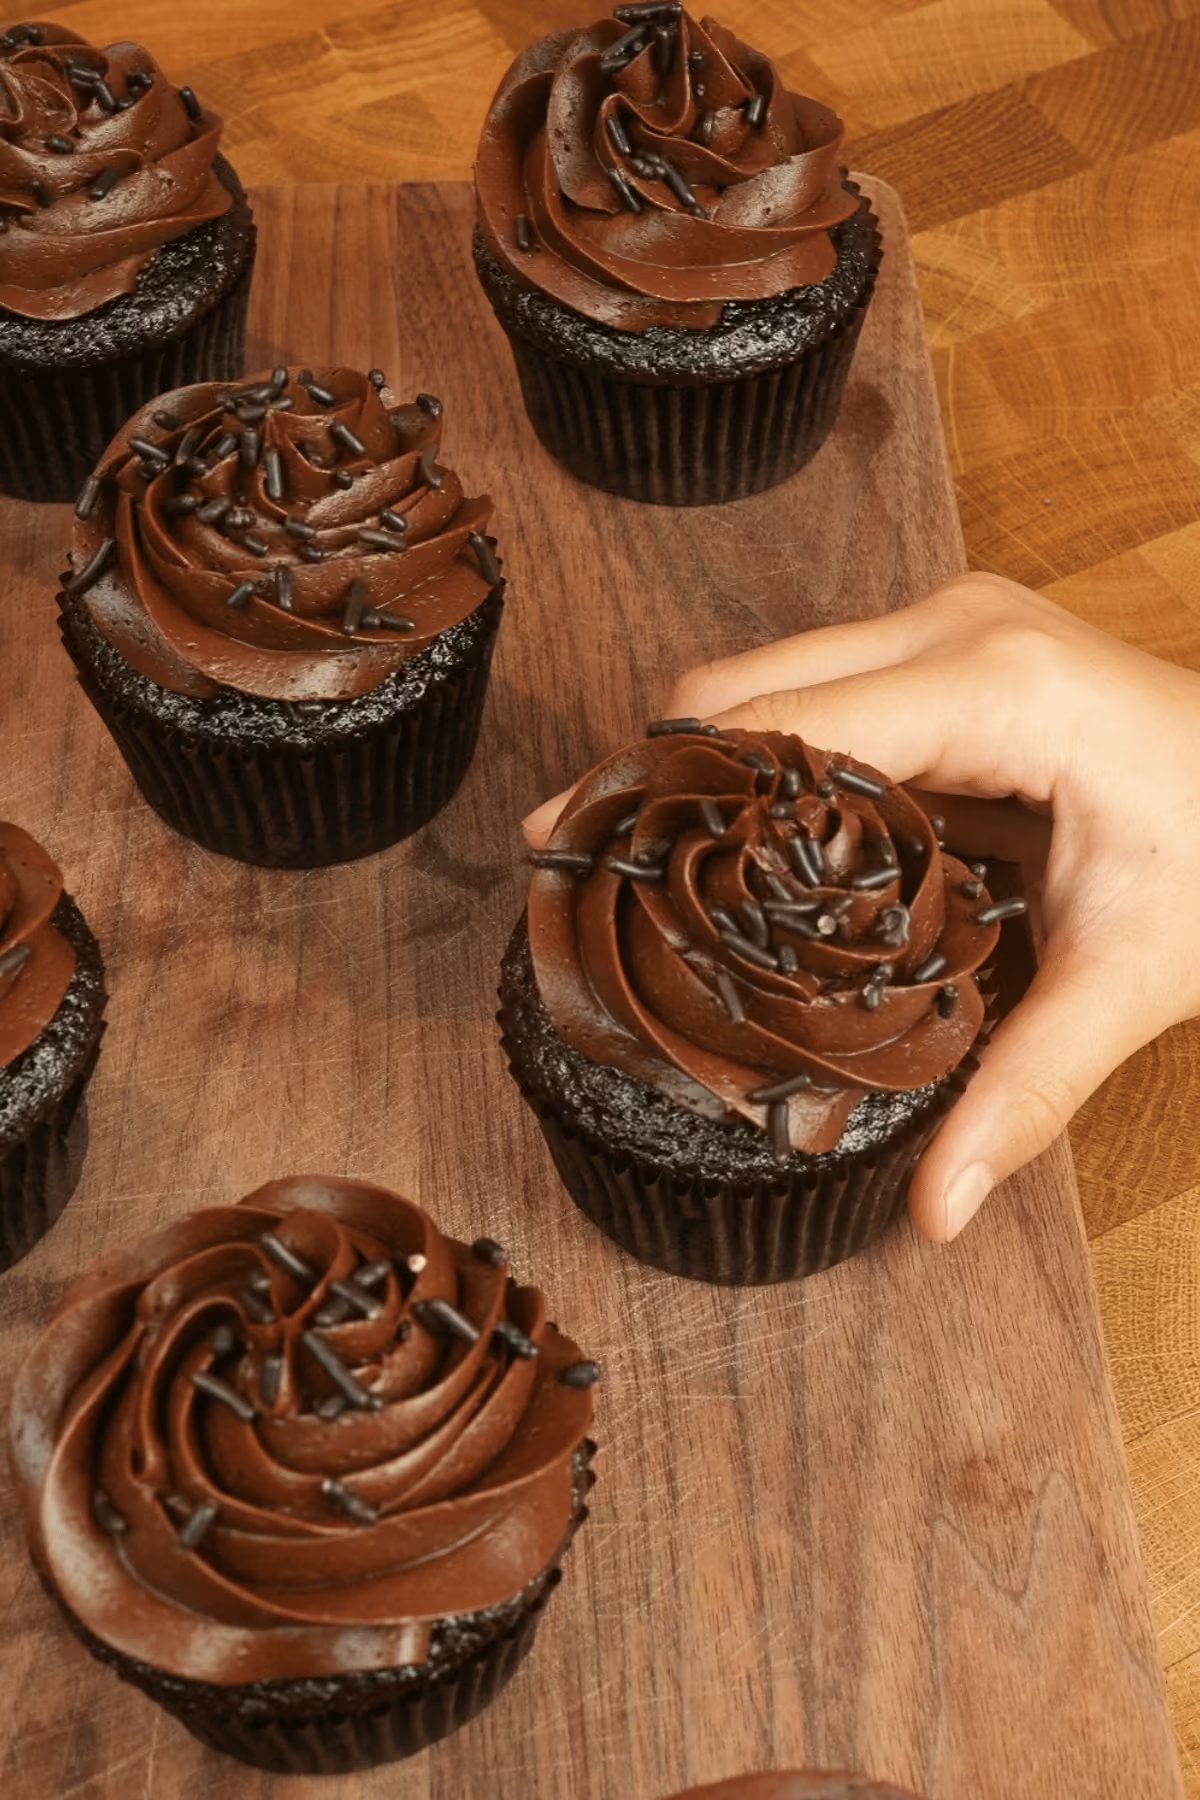
Load a piping bag with a tip of your choice. Classic choices are 1M or 2D, with the latter creating a slightly “ruffled” swirl. Here I’m using a 1M, which is a somewhat sharper swirl, to pipe little swirls on each cupcake before adding some chocolate sprinkles.
Did you know that you can create your own recipe with my Cakeculator?
My Cakeculator tool allows you to modify cake recipes so you can bake the one you need. The options I selected to create this recipe are:
Cake Flavor: Chocolate Indulgence
Pan Size: One dozen cupcakes
Frosting Flavor: Chocolate American Dreamy Buttercream
Frosting Level: Medium Coverage
Here are some great suggestions for you to experiment with:
One dozen Classic Chocolate Cupcakes with Vanilla American Dreamy Buttercream (this one is a slightly lighter, less dense chocolate cake with a great vanilla frosting - perfect for kids!)
Chocolate Indulgence Cake with Chocolate French Buttercream, 2 layers, 8 inches (This is a decadent version of these cupcakes with an upgraded Chocolate Buttercream - top this with fresh raspberries and make this one for the chocolate lover in your life!)
Video
Honors Members Section
This extra material is accessible to Sugarologie Honors members.
Become a member to view extended research notes, technique analysis, and supplemental materials! Learn more about Sugarologie Honors here.
Already a member?
Before starting the recipe, please read this!
Measure by weight, if possible.
Measuring by weight is the best way for you to replicate my recipes. I develop recipes using ingredients (even liquids) measured in grams, which is why you see them listed first in the recipe cards. For measurements under 5 grams, I will typically only list the volumetric measurements (teaspoons, etc.), as most home scales are not precise for such small weights.
In most cases, I have converted grams to volumetric measurements (aka US customary units) for bakers who prefer this method. However, the measurements are not as precise and may have awkward proportions. The recipes should still work, but for the ultimate precision, try to use weight.
This is the OXO scale I use daily. I also purchased this budget version of a good scale, which I keep at my Mom’s house for baking. If you’re interested in other tools I use for my baking, I’ve compiled a list here.
Use room temperature ingredients.
All my ingredients should be used at room temperature, or 65-75 °F/18-24 °C. I will always indicate if you need something outside this range. If no details are given, room temperature is the default.
Pay attention to the ingredient descriptions.
I try not to be brand-specific, but I will always note an interesting result from a type of ingredient, be it negative or positive.
A specific note regarding salt: I use Diamond Crystal Kosher salt for everything on this site except for frostings. In frostings, you want the salt to dissolve more easily, and kosher salt tends to leave granules behind. If you substitute table salt (more finely granulated) for recipes that list kosher salt, you must use half the volume indicated in my recipes.
Substitutions are hard.
That said, substitutions aren’t impossible but can be the toughest part of recipe development. Small swaps, like reduced-fat milk (2% fat) for whole milk (3.5% fat), usually work fine. However, bigger changes—such as replacing oil with applesauce or sour cream with Greek yogurt—can significantly impact texture and density.
Be wary of general, all-purpose substitutions in baking; I find that usually there is never a one size-fits-all solution. I carefully select ingredients for my recipes, so for the best results, start with the original recipe and modify with caution.
Read all the recipe instructions before beginning.
I’m in the “Pre-read the Chapter before Class Lecture” club... and I invite you to join! Baking new recipes can be intimidating, so let’s set you up for success. I want you to think about timeframes. Most fillings and frostings can be made ahead of time, and give you an extra day for mental space. Also, as you become a more proficient baker, you can anticipate and recognize steps. (“Oh, this has a meringue step, so I’ll need an extra clean bowl…” etc.) Ensure you go down the ingredient list and have everything at the right temperature.
.avif)
.avif)

.avif)

Chocolate Indulgence Cupcakes with Chocolate American Dreamy Buttercream
Chocolate Indulgence Cupcakes (makes 12-15 cupcakes):
- 64 g (⅔ cup) unsweetened cocoa powder, Dutch-processed*
- 180 g (¾ cup) water, boiling
- 240 g (1 ⅛ cups) brown sugar, light or dark
- 50 g (4 tablespoons) white sugar
- 100 g (½ cup) oil (any vegetable oil, such as canola or avocado)
- 1 ¼ teaspoons kosher salt
- 100 g (2 large) eggs, room temperature
- 10 g (2 teaspoons) vanilla extract
- 120 g (1 cup) all-purpose flour, unbleached
- 1 ½ teaspoons baking powder
Chocolate American Dreamy Buttercream (makes about 3 cups):
- 14 g (2 ¼ tablespoons) Dutch-processed cocoa powder, sifted**
- 32 g (2 ¼ tablespoons) boiling water
- 180 g (6 ⅓ ounces) any chocolate*** (I used semi-sweet chocolate chips)
- 170 g (¾ cup) unsalted butter, softened slightly
- 30 g (¼ cup) powdered sugar, sifted if lumpy
- ⅛ teaspoon fine salt (to taste, start with a pinch)
- chocolate or rainbow sprinkles for decorating (optional)
Bake the Cupcakes:
- Preheat the oven and pans.
Move your rack to the middle position. Preheat the oven to 350°F/180°C.
Add cupcake liners to a standard-sized cupcake tray. - Prepare the cocoa powder paste.
In a large mixing bowl, whisk the Dutch-processed cocoa powder with the boiling water until smooth and lump-free. Let it sit for 5–10 minutes to allow the chocolate flavor to bloom. - Mix in the remaining ingredients.
Add the sugars, oil, and salt to the cocoa mixture and whisk for about 1 minute until it forms a thick, runny chocolate sauce. The brown sugar may not fully dissolve, but the mixture should settle into a smooth consistency. Small bubbles may appear due to the alkaline cocoa reacting with the brown sugar.
Add the eggs and vanilla. Whisk vigorously by hand for at least 1 minute, until fully incorporated.
Whisk in the flour and baking powder until smooth, then lightly tap the bowl to release any large surface bubbles. - Fill the cupcake pan.
Fill each cupcake liner about ⅔ full with the chocolate batter. Depending on the size of your pan, you should get around 12-15 cupcakes. I usually get 13 or 14 (that’s 1 dozen for giving away and 1-2 taster cupcakes for the chef ;) ).
If you only have one cupcake pan, just let the batter sit at room temperature until you’re ready to bake the rest. - Bake for 18-22 minutes.
The centers should not jiggle when the pan is shaken. A skewer inserted in the center should come out with only a few crumbs. If using a thermometer, the internal temperature should read 190–200°F (88–93°C). For a fudgier texture, underbake by 1–2 minutes; once cooled, the cake will resemble a slightly denser flourless chocolate cake rather than a sponge-style layer cake. - Cool the cupcakes.
Place the hot cupcake tray onto a cooling rack. Once the cupcakes have cooled enough to handle, remove them from the trays and place them on a cooling rack to cool completely before frosting.
Make the Chocolate Frosting:
- Hydrate the cocoa powder.
Sift the Dutch-processed cocoa into a small bowl. Pour in the boiling water and stir until smooth. Let it cool while you prepare the other ingredients. - Melt the chocolate.
If using bar chocolate, chop it into small pieces and place it in a heatproof bowl. Microwave at 50% power in 20-second intervals, stirring each time until about 75% melted, then stir until fully melted. With my 1200 Watt microwave, this took 1 minute.
Alternatively, use a water bath: place the bowl in hot (not boiling) water off the heat and stir until about 75% melted, then stir until fully melted. , avoiding any water contact.
Set aside to cool until liquid but no longer hot to the touch (80–95°F / 26–35°C). - Whip the butter.
Add slightly softened butter to a stand mixer fitted with the whisk attachment. Mix on low to break it up, then whip on high until pale and fluffy. - Add the chocolate and cocoa paste.
Scrape the cooled, melted chocolate into the butter, then mix it in completely with a spatula. Then whip on high for a few minutes, scraping once. Add the cooled cocoa paste and continue whipping on high until fully emulsified; the frosting will appear slightly paler and thicker. - Adjust and smooth the frosting.
Taste and add powdered sugar and salt as needed, mixing to combine. Whip on high for 1 minute, then switch to the paddle attachment and mix on low for at least 3 minutes to remove air pockets.
Depending on the type of chocolate you use, the frosting may seem too loose at first. This is because we have softened/melted the primary structural components, which are butterfat and cocoa butter. To firm up the frosting, put a bit of ice in the bowl in the fridge for 5-10 minutes, then mix again until you like the consistency. Repeat until it’s firm enough to pipe onto your cupcakes.
Conversely, if you let the frosting sit out at room temperature for a while (mine took about 45 minutes) before using, you may notice it becomes very stiff. This is great! It’s normal because the cocoa butter (along with the other fats in the chocolate) has now solidified into an intact emulsion, a nd all you have to do is mix on high speed to get it smooth, creamy, and pipeable.
Frost the Cupcakes:
- Once the cupcakes are completely cooled and the frosting is smooth and creamy, you’re ready to decorate. Fill a large piping bag fitted with a tip of your choice (I used Wilton 1M) with all the chocolate buttercream. Carefully pipe a swirl onto each cupcake. You should have enough to use about 2.5-3 tablespoons of buttercream per cupcake.

Recipe Card - Adriana's Notes
*Dutch-processed (European-style) cocoa is darker (sometimes with a reddish hue) compared to natural cocoa. This is due to alkalization, a process that neutralizes acidity, resulting in a smoother, mellower chocolate flavor essential to this cake. I tested natural cocoa, but it produced an overly acidic and astringent taste with a chalky texture.
**Dutch-processed cocoa also works best here. Its alkalization creates a milder, less acidic flavor and a darker hue, giving the frosting a deep brown color and a well-rounded chocolate taste. It is also more soluble in water and, in my experience, incorporates into frostings more easily than natural cocoas, which tend to leave a film of cocoa-water on top of the frosting.
***This recipe works with any chocolate (bars, chips, or callets) as long as it contains an emulsifier (listed as "lecithin," "soy lecithin," or "sunflower lecithin"). If you use chocolate from a bar, you’ll need to chop it up into chip-sized chunks, which I’ll annotate in the recipe card for you.
You can use any chocolate flavor except white. For this recipe, I highly suggest using semi-sweet chocolate chips (the cheapest option with great flavor), though feel free to use a chocolate bar too. Check my Complete Guide to Chocolate American Dreamy Buttercream to learn about choosing chocolate for this recipe.
.avif)
.avif)

Got room for more dessert?
Subscribe to my Crumby Data newsletter! I share behind-the-scenes looks at recipe development, flavor testing for the Cakeculator, and life as a content creator. It’s free, lands in your inbox every few weeks, and you can unsubscribe anytime...no strings attached :)
Feel free to take a look at previous newsletters here!
.ico)