.avif)
How To Make Ermine Frosting: Your Complete Guide


Ermine Buttercream combines a sweetened flour paste with whipped butter, giving it a unique, delicious flavor and light texture. The stability of the flour paste allows us to use less butter than other buttercreams, which is likely why many compare this frosting to whipped cream. It also uses less sugar and is ideal for those who need the stability of a buttercream but dislike the heaviness and sweetness of other frostings.
.avif)
Welcome to my Ermine Buttercream guide! We’ll cover things like texture, aeration, and ingredient chemistry. You’ll learn how this frosting differs from all the others on my site, whether it’s right for your dessert, and the exact process to create and customize your perfect Ermine Buttercream.
What is Ermine Buttercream?
My Ermine Buttercreams are a type of True Buttercream:

True Buttercreams are a family of stable emulsion frostings, where fat and water-based ingredients are mixed to create a thick, creamy texture. I’ll often refer to these as “emulsion-based buttercreams.”
Generally, True Buttercreams:
- moderate sweetness,
- low aeration,
- a creamy and buttery texture,
- the ability to create intricate piped designs and smooth cake sides,
- excellent stability at room temperature and under pressure, and
- are easily dyed and flavored.
So, what sets Ermine Buttercream apart from other Frostings?
Let’s get into the specifics of this buttercream:
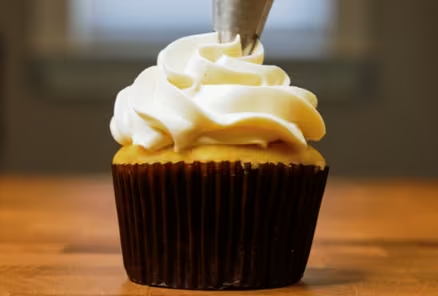
Below is a preparation of Ermine Buttercream using unbleached, all-purpose flour. I’ve not added any colorants so that you can see its natural color.
.avif)
What is the texture of Ermine Buttercream?
This buttercream has the most unique texture of my True Buttercreams; it’s creamy and buttery yet deceivingly light without any greasiness or heaviness.
To determine the texture of a frosting, I look at the emulsion fat-to-water ratio and aeration.
For this emulsion, Ermine Buttercream has an interestingly high ratio of water-based ingredients, such as sweetened flour paste. Typically, how much you can shift this ratio is balanced. And because the sweetened flour paste is relatively stable, we can add more, giving the final frosting a low butter amount—only 25% compared to most True Buttercreams, which have fat percentages between 35-45%.
Aeration is the amount of air incorporated into the buttercream during mixing. This buttercream's aeration is low, which is typical for my True Buttercreams. Don’t let these low percentages deter you, though. The emulsion and its components play a huge part in these types of frostings, and the high-ratio sweetened flour paste and its pudding-like smooth texture are light enough to compensate for the low air percentage.
What is the taste and flavor of Ermine Buttercream?
Of all the True Buttercreams, this frosting contains the least butter and has a lighter flavor. Most of the taste and flavor come from the sweetened flour paste, which can be made in various ways. The classic style of this buttercream uses all-purpose flour and tastes like a very light vanilla pudding.
At around 27% sugar, this buttercream is also one of the least sweet of my True Buttercreams, making it an ideal frosting if you prefer lightly sweetened desserts or are trying to balance the sweetness of your dessert/cake.
How stable is Ermine Buttercream?
The stability of Ermine Buttercream is one of the best of all my True Buttercreams. This and Italian Meringue Buttercream performed the best in my temperature and pressure studies, maintaining its shape longer than all the others.
Almost all of my True Buttercreams are stable at ambient room temperatures, up to 85 °F/30 °C. This is from these buttercreams containing a large ratio of butter, which is the primary source of pressure and temperature stability of these buttercreams. Butter contains fats that start to change from its solid state to a liquid one around 90-95 °F/32-35 °C. Changing a portion or all of the fat to something like vegetable shortening will increase your stability by at least 10 °F/5 °C higher, but this does affect the final flavor of your frosting.
In my experiments, Ermine Buttercream has relatively better temperature and pressure stability. I don’t believe this has anything to do with gluten, especially since gluten-free flours perform just as well. I think it is because of the inherent general characteristics of a flour paste/gel; it’s made of a cooked starch gel-like network, which is a commonly stable preparation. When added to butterfat, it’s an extra source of stability for this buttercream. (If you think of other water-based components in buttercream emulsions, they are less “solid,” such as condensed milk in Russian buttercream or meringues, which are not as stable at holding structure as a flour paste gel.)
What ingredients do you need for Ermine Buttercream?
%2520(1).avif)
1 | FLOUR
Ermine is unique among True buttercreams because it uses a sweetened flour paste. You can use various flours, which I'll discuss in the section below. In this tutorial, I'm using traditional wheat-based, all-purpose unbleached flour. It's readily available, has excellent thickening properties, and gives a pleasant, toasted flavor reminiscent of cooked pudding or custards.
2 | WHITE GRANULATED SUGAR
Sugar is the source of sweetness for this buttercream. I use granulated and cook it with the flour and milk, which allows it to dissolve completely and create a silky smooth textured buttercream.
3 | WHOLE MILK
Milk is the liquid that contributes water to the flour paste, allowing the starch granules to swell and dissolve the added white sugar. Ensure you add cold from the fridge, allowing the flour to distribute more evenly before heating and preventing clumps. Whole milk (with 3.5% fat content) is required for the best version of this frosting. Milk contains a specific kind of fat called phospholipids, which are excellent emulsifiers. Using lower-fat milk will result in a looser, less stable buttercream that will be hard to work with.
4 | HEAVY CREAM
Heavy cream adds phospholipid fats to create a more stable buttercream than frosting with whole milk alone. Different types of heavy cream are available, and you can use any kind as long as it’s labeled “heavy cream” or “heavy whipping cream.” This indicates that the fat content is around 36%.
5 | UNSALTED BUTTER
Unsalted butter is the primary source of fat and, therefore, is the stability of this buttercream. It is key to any of my emulsion-based frostings because it contains a key component inside the butter called an emulsifier. This ties together ingredients; in this case, it’s bringing together the sweetened flour paste and fat in the butter.
I always use unsalted butter, as using salted butter could produce a very salty frosting, which is incredibly difficult to fix.
6 | VANILLA EXTRACT
Vanilla is the primary flavoring agent for this frosting, but you can use any extract you like. Some extracts are stronger than others, so look up proper conversions before making this switch.
7 | SALT
Adding salt to balance the sweetness of frostings and icings is always good. I use finely granulated (sometimes called “table salt”) for frostings, which dissolve much more readily than Kosher varieties.

Why do you need flour in a buttercream? What flours work in Ermine Buttercream?
Flour is the primary thickening agent for the paste in Ermine Buttercreams. Without it, you'd only have sugar syrup, which makes an excellent frosting but results in a different type. My Sugarologie Buttercreams are based on this concept. Flour forms the foundation of the sweetened paste and contributes texture, flavor, and bulk to the final buttercream.
Wheat-based all-purpose flour is the classic choice for Ermine Buttercream, but I often get asked for substitutions. My experiments show you can substitute wheat flour with most finely ground flours. I didn’t test nut-based flours, but I guess that they can’t be used alone without another type listed here.
Gluten seems to play little to no role in stability, as most of the flours I tested are gluten-free, and the frostings had similar stabilities throughout. Instead, what is more important is the strength of gelatinization - or its ability to thicken and gel liquids. (Gelatinization sounds very familiar to gelatin, the animal-based collagen proteins that firm up Jell-O. In this context, however, gelatinization refers to starches' gelling process.)
Here are the flours I tested for Ermine Buttercream. Although each starch has different gelatinization temperatures and strengths, they thicken around the same temperature (200 °F/93° C) and can be used interchangeably for this application. Some do have a have a few notes, which I’ve indicated below:
%2520(1).avif)
All these modifications tasted delicious. However, there were some notable standouts:
- Tapioca starch creates the gummiest, stickiest paste that will make you think I’m crazy for suggesting it, but it mixes into the butter as easily as the others and results in the smoothest and silkiest buttercream.
- If you enjoy the sweet rice flavor of mochi desserts, try Mochiko flour. It has the most delicious hint of mochi that I adore, and it would be delicious to create some amazing cake combinations (matcha, black sesame, and mango come to mind).
- Instant Clear Jel is a surprising winner. I didn’t expect it to work well, but it’s so remarkably easy and delicious that I dedicated two entire posts to this type of modified starch:
Instant Ermine Frosting: This one uses Instant Clear Jel is unflavored and can be customized with endless variations.
Pudding Ermine Frosting: This one uses a pretty common pantry ingredient that also contains modified starches: instant pudding. You are limited by flavors with this one, but it comes together just as quickly as the unflavored version, and in my post I have some new favorites that are so easy and worth trying. - Many of you have requested a chocolate Ermine Buttercream recipe. Cocoa powder contains thickening starches (amongst the other cacao pod powdered plant materials) and falls in this category of substitutions. To make this variation, use the recipe below, but in place of “all-purpose flour” in the recipe card, use half cocoa powder (whatever type you prefer; Dutch-processed, black, or natural) and half another flour of your choice. Proceed with the rest of the recipe as written, and please use weights to do this substitution.
The starch type matters if you plan on making Ermine Buttercream ahead of time.
Unlike other True Buttercreams that have stabilities based on the butterfat, this one relies more on the sweetened flour paste. The starch gel can degrade and melt when reheated. For all starches, it’s best to allow stored buttercream from the fridge to come to room temperature naturally before using. If you apply heat, either through a blow torch or a microwave, you will melt the gel paste, resulting in a very loose buttercream. The only starches somewhat resistant to this are tapioca starch and waxy maize corn starch (different from the regular corn starch I’ve pictured above.)
How do you modify the flavor of Ermine Buttercream?
Modifying Ermine Buttercream's flavor is special because it puts the flavor front and center, even before you taste the butter. Besides my Sugarologie Buttercreams, Ermine is my favorite to adjust. A bonus is that it’s pretty easy to get creative here.
The easiest way to change the flavor of Ermine is to substitute the whole milk in the recipe for another water-based liquid. Some easy ideas include steeping herbs, teas, or coffees in milk or water. For these steeped flavors, I usually double the amount of tea or coffee for a usual “cup of tea/coffee” and sweeten it to a medium sweetness. Then, I measured how much liquid I needed to add to the recipe to replace the whole milk.
If you’ve come from my YouTube video, I demoed my Boba Shop Frosting Collection. Here’s how I make the various liquids for the milk substitution.
For the Korean Banana Milk Buttercream:
Directly substitute the banana milk. I buy the Binggrae brand, and you can get in on Amazon, here, or cheaper at your local Asian grocery store. This brand also carries Taro, Melon, Strawberry, and Coffee flavors, which will also work. The result is a non-artificial-tasting banana buttercream that’s so beautifully banana-flavored. And because the milk already comes sweetened, extra sugar is unnecessary. Proceed as normal for the rest of the recipe.
For the Thai Green Tea Buttercream:
Prepare the tea according to the package instructions. I use the Chatramue brand and get it from Amazon, here. A typical glass would require about 5 grams of tea leaves per 300 mLs of boiling water, but I double it to 10 grams. I steep for 4 minutes, then drain out the leaves. I then sweeten the tea with about 2 tablespoons of white sugar. This creates about 275 -ish mLs (or 275 grams) of liquid that you can now use to replace the whole milk in the recipe. Proceed as normal for the rest of the recipe.
For the Vietnamese Coffee Buttercream:
Prepare a very strong large cup of coffee using Vietnamese coffee grounds. I have this cute filter set from I bought from a small business, and it works great for my Vietnamese coffee cravings. Sweeten your coffee with about 2 tablespoons of sugar and measure the quantity to use in place of the whole milk. Proceed as normal for the rest of the recipe.
For the Strawberries ‘n Cream Buttercream:
For a 3 cup frosting recipe, I pureed 300 grams of strawberries with 2 tablespoons of sugar. I used frozen strawberries that I defrosted by heating it in the microwave until soft and mushy. (Frozen fruit is better for this recipe as the ice crystals puncture the cells during freezing, releasing more fruity liquid, which is what we want.) I then pushed the puree through a strainer to remove large pieces and measured the amount to replace the whole milk. For this modification, if you want to use a puree, please only use all-purpose flour. If you want or need to use another type of starch, use fruit juice with a higher water content. Then, proceed with the recipe as written.
Step by step:
How to make Ermine Frosting
STEP 1 | MAKE SWEETENED FLOUR PASTE
WHY: The secret to a super smooth texture on your Ermine buttercream is evenly distributed starch granules within the flour. To do this, we will continuously whisk the entire time during the heating step. Be sure to scrape the corners of your pan; this tends to be a collecting area for thickened paste. This step greatly reduces the risk of a clumpy flour paste and buttercream.
I sometimes hear this preparation labeled as a roux, which is incorrect. A roux requires flour cooked (and sometimes browned) in fat, then hydrated with a liquid. This is a paste made of flour, liquid, and some sugar (no fat). Depending on the extent of the heating process, the paste can solidify or “gel,” so you’ll see me refer to this preparation as both a paste or gel.
HOW:

IHave a timer handy. Set it for 1 minute for every 1 cup of liquid (milk plus heavy cream) in the recipe. This recipe combines 2 ¼ cups of milk and heavy cream, so I’ll set my timer for 2 minutes and 15 seconds. Don’t start the timer yet; just set it aside for easy access.
In a shallow pan, add the flour and sugar (1a); whisk until combined, then add the cold milk and heavy cream. Whisk until the flour is evenly distributed (1b). Using cold milk ensures you can properly disperse the sugar and flour before they start to cook, preventing the final flour paste from clumping.
Place the pan atop medium-low heat and whisk the entire time. Here, you can see I whisked so vigorously and constantly that bubbles formed before it even thickened (1c). (By the way, these bubbles are from milk proteins and make up the foam that tops your lattes. 😉)

Keep heating and whisking until the mixture thickens and you see large bubbles pop (1d). At this point, start the timer. Continue heating while stirring constantly with a spatula or your whisk. At the end of this step, your paste should be nice and thick (1e).
STEP 2 | ALLOW PASTE TO COOL.
WHY:
In the previous step, we heated the paste to a high temperature, but before adding butter, we had to cool the paste down to room temperature. The best way to do this is by pouring the hot paste into a shallow plate or container, which you can let sit out at room temperature. You can also speed this up by placing the container in the fridge or freezer. (Just don’t let it freeze completely! You must want it cool to the touch.)
Straining the paste is optional here, but it’s a guaranteed way to yield a super smooth buttercream if you weren’t confident about your whisking skills in step 1. Don’t skip covering the paste directly with plastic wrap or parchment paper. Sprayed with a bit of oil, this covers the exposed surface of the paste, which can dehydrate faster than the interior, causing skin to form.
HOW:

Pour the hot cooked flour mixture through a sieve (optional) and onto a shallow tray or plate (2a). Press a sheet of plastic wrap that has been sprayed with oil directly against the surface of the paste (2b). I usually use my hands to spread the paste into the thinner layer so it cools quicker. You can let this sit at room temperature, but sometimes, I will place my tray in the freezer for 10-15 minutes.
STEP 3 | AERATE THE BUTTER.
WHY:
Straight out of the box, butter has a tiny bit of aeration or tiny air bubbles contained within. The exact percentage of aeration depends on the manufacturer but generally about 1-7% of a butter’s volume is air. Using butter as-is without this pre-aeration step is fine, but generally results in a denser, creamier final frosting that can feel overly fatty/buttery. Aerating the butter lightens not only the color but the texture. This step is essential in Ermine Buttercream as it gets the butter to the perfect consistency and temperature for emulsifying the sweetened flour paste, which gives it a creamier and more homogenous consistency.
HOW:

For proper aeration, ensure the butter temperature is around 60-70°F/15-21°C (3a). You don’t need a thermometer, but when the butter is at this temperature, you should be able to slide the whisk attachment into it with moderate pressure (3a, inset).

Add the butter to your mixing bowl and whisk on high speed for about 2 minutes, scraping down the sides at least once (3b,c). Aerated butter will still be thick and ball inside the whisk (3d).
STEP 4 | MIX THE FLOUR PASTE INTO THE BUTTER.
WHY:
Ensure that the paste is cool, and add the paste in increments. This allows the butter to take in and emulsify the sweetened flour paste slowly. A few times, I’ve been impatient and added everything all at once to the butter, but in the end, I feel it takes much longer to get the emulsion stable than if you were to do increments.
HOW:

Ensure that your paste is cool to the touch. Butterfat starts to liquefy at around 95 °F/35 °C, so we want to ensure the paste is well below that so it doesn’t melt the butter when added. Mine here is around 81 °F/27 °C and I would not exceed 85 °F/29 °C (4a). You don’t need a thermometer; just use your hands and feel atop the plastic wrap to keep it cool. The thickness should be easily picked up on a spatula without dripping or oozing off (4b).

Mix the paste in 4 to 5 additions. Add the first amount, then whisk on high speed for a few seconds before adding the next (4c). It should incorporate very easily. Once all the flour paste has been added, add the pinch of salt and vanilla extract mix on high speed for an entire 2 minutes. The frosting will have huge air pockets (more than you may be used to seeing in buttercreams) and look a bit uneven (4d). It’s ok so long as you don’t see any patches of flour paste remaining.
STEP 5 | SMOOTH OUT THE BUTTERCREAM.
WHY:
The whisk with all its wires, is much more efficient at emulsifying than a paddle with a thick singular wire. However, during the mixing process with a whisk attachment, we’ll inevitably be also mixing in tons of air, which can further collect into larger air pockets. Switch the paddle attachment (one with a silicone edge, if you can), which smooths the frosting against the bowl and greatly reduce the amount of large air gaps in your final frosting.
HOW:

The whisk introduces tons of air pockets, so switch to the paddle attachment to smooth things out. If you have the one with the silicone edge, that works fantastic for frostings, but a regular metal paddle works great too (5a). Mix on low speed for at least 2-3 minutes. The frosting will look smoother but may have a few air pockets; that’s ok (5b).

Because this frosting has a lower ratio of butterfat and uses a flour paste, it doesn’t get 100% smooth until you manually use a spatula or piping tip with it (see the cupcakes earlier in the post for examples). If you run a metal spatula continuously over the top of this buttercream, it will have a smooth surface (5 c,d).
Storage Tips
Leftover buttercream stores well in the fridge or freezer. Additionally, this buttercream can be made ahead of time for larger cake projects. Allow the buttercream to come to room temperature naturally before whipping. Heating the buttercream (either with a blowtorch of microwave) will destroy the gel paste and will result in a runny frosting.
For a detailed tutorial, check out my How to Store Buttercream Guide.
Video
Honors Members Section
This extra material is accessible to Sugarologie Honors members.
Become a member to view extended research notes, technique analysis, and supplemental materials! Learn more about Sugarologie Honors here.
Already a member?
Before starting the recipe, please read this!
Measure by weight, if possible.
Measuring by weight is the best way for you to replicate my recipes. I develop recipes using ingredients (even liquids) measured in grams, which is why you see them listed first in the recipe cards. For measurements under 5 grams, I will typically only list the volumetric measurements (teaspoons, etc.), as most home scales are not precise for such small weights.
In most cases, I have converted grams to volumetric measurements (aka US customary units) for bakers who prefer this method. However, the measurements are not as precise and may have awkward proportions. The recipes should still work, but for the ultimate precision, try to use weight.
This is the OXO scale I use daily. I also purchased this budget version of a good scale, which I keep at my Mom’s house for baking. If you’re interested in other tools I use for my baking, I’ve compiled a list here.
Use room temperature ingredients.
All my ingredients should be used at room temperature, or 65-75 °F/18-24 °C. I will always indicate if you need something outside this range. If no details are given, room temperature is the default.
Pay attention to the ingredient descriptions.
I try not to be brand-specific, but I will always note an interesting result from a type of ingredient, be it negative or positive.
A specific note regarding salt: I use Diamond Crystal Kosher salt for everything on this site except for frostings. In frostings, you want the salt to dissolve more easily, and kosher salt tends to leave granules behind. If you substitute table salt (more finely granulated) for recipes that list kosher salt, you must use half the volume indicated in my recipes.
Substitutions are hard.
That said, substitutions aren’t impossible but can be the toughest part of recipe development. Small swaps, like reduced-fat milk (2% fat) for whole milk (3.5% fat), usually work fine. However, bigger changes—such as replacing oil with applesauce or sour cream with Greek yogurt—can significantly impact texture and density.
Be wary of general, all-purpose substitutions in baking; I find that usually there is never a one size-fits-all solution. I carefully select ingredients for my recipes, so for the best results, start with the original recipe and modify with caution.
Read all the recipe instructions before beginning.
I’m in the “Pre-read the Chapter before Class Lecture” club... and I invite you to join! Baking new recipes can be intimidating, so let’s set you up for success. I want you to think about timeframes. Most fillings and frostings can be made ahead of time, and give you an extra day for mental space. Also, as you become a more proficient baker, you can anticipate and recognize steps. (“Oh, this has a meringue step, so I’ll need an extra clean bowl…” etc.) Ensure you go down the ingredient list and have everything at the right temperature.
.avif)

.avif)


Vanilla Ermine Buttercream
- 16 g (2 tablespoons + 1 teaspoon) all-purpose flour, bleached or unbleached*
- 83 g (6 tablespoons + 2 teaspoons) white granulated sugar
- 81 g (⅓ cup) whole milk, cold from fridge
- 41 g (2 tablespoons + 1 teaspoon) heavy cream**, cold from fridge
- 94 g (7 tablespoons) unsalted butter
- ½ teaspoon vanilla extract
- Small pinch of fine salt
For larger quantities or to pair with a cake recipe, go to my Cakeculator and choose “Vanilla Ermine Buttercream”.
- 48 g (6 ½ tablespoons) all-purpose flour, bleached or unbleached*
- 250 g (1 ¼ cups) white granulated sugar
- 244 g (1 cup) whole milk, cold from fridge
- 122 g (½ cup) heavy cream**, cold from fridge
- 283 g (1 ¼ cups) unsalted butter
- 1 ¼ teaspoons vanilla extract
- pinch of fine salt
For larger quantities or to pair with a cake recipe, go to my Cakeculator and choose “Vanilla Ermine Buttercream”.
- Cook sweetened flour paste.
If you plan to sieve your flour paste, place your sieve atop a shallow tray or plate for easy access. Otherwise, just have your tray out and ready.
Get a timer ready. Set the timer for one minute for every cup of milk/cream. (e.g., for the 1 cup frosting, it’s about 30 seconds, and the 3 cup frosting is 1 minute and 30 seconds.)
In a pan, whisk together the flour and sugar. Pour in the cold milk and heavy cream. Whisk until you no longer see lumps of flour.
Place the pan on medium-low heat. Cook the flour mixture, whisking continuously and scraping the sides. It will gradually start to thicken into a loose pudding.
Once you see large bubbles pop in the center, start your timer and continue to whisk vigorously. Feel free to decrease the heat a bit if the starch begins sticking to the bottom of the pan, but you want a steady bubbling mixture throughout this process.
- Sieve (optional) and cool sweetened flour paste.
When the timer is up, use a spatula to scrape the hot paste onto your tray.
If you have clumps or want to ensure you get a super smooth frosting, push the hot paste through a sieve onto the tray.
Spray a piece of plastic wrap with oil and press it directly onto the surface of the paste. I like to flatten it out a bit, too, so it cools faster.
Let this sit at room temperature to cool. I will sometimes place the tray in the freezer for about 10-15 minutes to speed up the process. It should feel completely cool to the touch before use.
- Aerate butter.
Add the softened butter to the bowl of your stand mixer. Using the whisk attachment, beat the butter on high speed until it's paler in color and slightly more voluminous. Add the vanilla extract and pinch of salt and mix on high speed for 2 minutes. - Add cooled flour paste.
Ensure your paste is cool to the touch. Mix the paste in 4 to 5 additions. Add the first amount, then whisk on high speed for a few seconds before adding the next. - Adjust buttercream for texture.
The whisk introduces many air pockets, so switch to the paddle attachment for smoothing. Run the mixer on low speed for a few minutes until most of the air pockets are smoothed out.
Compared to most other buttercreams, this frosting may feel looser. Don't let that deter you; it will still pipe and frost a cake just fine. It has a lower butter content than my other buttercreams, so that it will feel less dense. Running a spatula over the top of the buttercream several times while smoothing onto cakes or through a piping tip will give you the smoothest result with this frosting style.

Recipe Card - Adriana's Notes
*You can use many types of flour. Please refer to the infographic in my written post to learn more about this substitution.
**You can use all whole milk for this recipe; it’s a direct substitution, so just use the same amount of whole milk for heavy cream. The result is a looser buttercream, which will still frost and pipe good. I prefer this heavy cream version - it only increases the fat by about 2%, so it is nearly undetectable on the palate, yet it creates a more stable emulsion, which I find frosts and smooths much more beautifully.However, do not use milk with a lower fat content than whole (3.5%). You may get it to work in small amounts of frosting, but as you exceed 2 cups of frosting, lower fat percentages have more trouble emulsifying with the butter, so you’ll end up with a very loose and drippy frosting.
.avif)

Got room for more dessert?
Subscribe to my Crumby Data newsletter! I share behind-the-scenes looks at recipe development, flavor testing for the Cakeculator, and life as a content creator. It’s free, lands in your inbox every few weeks, and you can unsubscribe anytime...no strings attached :)
Feel free to take a look at previous newsletters here!
.ico)
