.avif)
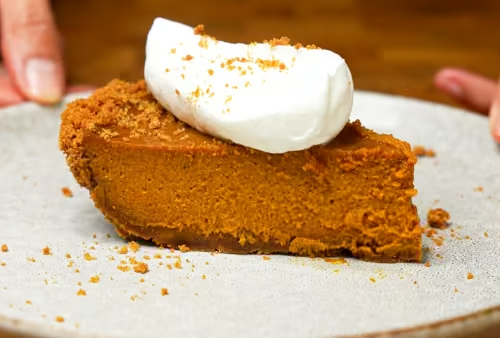
Perfect Sweet Tart Crust


A perfect tart crust is a foundation for great desserts. You don't have to be a pastry chef (I'm definitely not) to make a beautiful and tasty one.
Tarts are my most requested dessert. If you learn to make those, you'll always have something amazing to bring to a dinner party or just have something fantastically delicious to eat with your family. (I just had a lemon curd tartlet with my coffee this morning and it was perfect.)
You'll also save some money too because the bakery ones can get expensive!
And honestly, homemade is better because you can fill and top it with whatever you like. My family loves them so much that we use them in place of birthday cakes all the time. (I guess that's how I learned to make them 😀)
Ingredients
- 1/2 cup (113g/4 oz) unsalted butter, cold from the fridge, cut into TB chunks
- 1/2 cup (53g/1.8 oz) powdered sugar
- 1/2 teaspoon kosher salt
- 1 3/4 scant cups (206g) all-purpose flour (or pastry flour)
- 3.5 tsp (15g/0.6 oz) one egg yolk, from a large egg
- 2 tablespoons (30g/1 oz) whole milk
*For beginners, I recommend all-purpose flour. It has a higher protein content, which will make the dough much easier to handle when raw. If you're into the super crumbly texture, and can find it, by all means, pastry flour is excellent. I've used Bob's Red Mill Pastry Flour with great success.
**If you need smaller sized tarts, this recipe will make seven 4" tartlets, or about 25 hors d'oeuvres sized mini tartlets.
Instructions

1. To a stand mixer, add the butter, powdered sugar, and salt. Mix on medium-low speed until smooth and completely combined. Scrape down the sides.

2. Add the flour and turn the mixer on low. Mix until the butter is evenly incorporated into flour and feels like damp sand. This should take a minute or two.

3. Use a fork to mix the egg yolk and milk in a small bowl. Pour it into the mixer, and mix on low. Don't overmix at this point; you will form gluten strands in the dough, which will yield a tough tart crust when baked.

4. Feel the dough with your hands. It is done mixing when it feels very damp, contains no visible flour, and easily formed into a ball.

5. Place the dough onto some plastic wrap, and form it into a ball, and then flatten into a disc. Wrap it tightly and let it rest in the fridge for at least an hour.

6. When you are ready to bake, place rack in the lower third of your oven and preheat to 400 °F for large tarts (9"/10") or 375 °F for 4" tartlets and smaller tartlets. Roll out your dough by flouring the work surface or lining with plastic wrap until it is about 1/8-1/4" thick.

7. (If using tartlet pans, cut the dough into circles first using the tartlet pans as a guide about 1" larger in diameter.) Place the tart dough inside of the tart pan(s), making sure the dough is firmly against the sides. Use a fork to poke the bottom a few times. Freeze for at least 10 minutes or until completely frozen, then for large tarts only: line frozen tarts with parchment paper or foil and fill with pie weights/beans/rice.

8. For large 9"/10" tarts: Bake on a rimmed baking sheet for about 15-20 minutes or until the dough has hardened a bit, but is still very pale in color. Remove the weights and bake for another 5-10 minutes or until golden brown. For 4" tartlets and smaller tartlets: Bake on a rimmed baking sheet for about 12-15 minutes until the tart edges are golden brown and the bottoms are starting to turn brown. Cool completely before filling.

Storage. Tightly wrapped dough (up to step 5) keeps in the fridge for up to two days. Thaw at room temperature before rolling out to prevent cracking. You can can also store this dough in the freezer. Just put your plastic wrapped dough in a freezer ziplock bag for up to two months. Thaw in the fridge the day before you need them. I've baked crusts a day before serving and kept them at room temperature in an airtight container, just like cookies. I then fill and decorate the tarts the day that I plan to eat them.
Step by step:
Video
Honors Members Section
This extra material is accessible to Sugarologie Honors members.
Become a member to view extended research notes, technique analysis, and supplemental materials! Learn more about Sugarologie Honors here.
Already a member?
Before starting the recipe, please read this!
Measure by weight, if possible.
Measuring by weight is the best way for you to replicate my recipes. I develop recipes using ingredients (even liquids) measured in grams, which is why you see them listed first in the recipe cards. For measurements under 5 grams, I will typically only list the volumetric measurements (teaspoons, etc.), as most home scales are not precise for such small weights.
In most cases, I have converted grams to volumetric measurements (aka US customary units) for bakers who prefer this method. However, the measurements are not as precise and may have awkward proportions. The recipes should still work, but for the ultimate precision, try to use weight.
This is the OXO scale I use daily. I also purchased this budget version of a good scale, which I keep at my Mom’s house for baking. If you’re interested in other tools I use for my baking, I’ve compiled a list here.
Use room temperature ingredients.
All my ingredients should be used at room temperature, or 65-75 °F/18-24 °C. I will always indicate if you need something outside this range. If no details are given, room temperature is the default.
Pay attention to the ingredient descriptions.
I try not to be brand-specific, but I will always note an interesting result from a type of ingredient, be it negative or positive.
A specific note regarding salt: I use Diamond Crystal Kosher salt for everything on this site except for frostings. In frostings, you want the salt to dissolve more easily, and kosher salt tends to leave granules behind. If you substitute table salt (more finely granulated) for recipes that list kosher salt, you must use half the volume indicated in my recipes.
Substitutions are hard.
That said, substitutions aren’t impossible but can be the toughest part of recipe development. Small swaps, like reduced-fat milk (2% fat) for whole milk (3.5% fat), usually work fine. However, bigger changes—such as replacing oil with applesauce or sour cream with Greek yogurt—can significantly impact texture and density.
Be wary of general, all-purpose substitutions in baking; I find that usually there is never a one size-fits-all solution. I carefully select ingredients for my recipes, so for the best results, start with the original recipe and modify with caution.
Read all the recipe instructions before beginning.
I’m in the “Pre-read the Chapter before Class Lecture” club... and I invite you to join! Baking new recipes can be intimidating, so let’s set you up for success. I want you to think about timeframes. Most fillings and frostings can be made ahead of time, and give you an extra day for mental space. Also, as you become a more proficient baker, you can anticipate and recognize steps. (“Oh, this has a meringue step, so I’ll need an extra clean bowl…” etc.) Ensure you go down the ingredient list and have everything at the right temperature.
.avif)

.avif)


Recipe Card - Adriana's Notes
Recommended Sugar Lab Recipes + Experiments
.png)


Got room for more dessert?
Subscribe to my Crumby Data newsletter! I share behind-the-scenes looks at recipe development, flavor testing for the Cakeculator, and life as a content creator. It’s free, lands in your inbox every few weeks, and you can unsubscribe anytime...no strings attached :)
Feel free to take a look at previous newsletters here!
.ico)